Like the Little Engine That Could, do you want to write faster and produce better works of fiction? Let the Story Engines Blueprint plot structure help.
Combining the seven key elements of blockbuster storytelling, this structure is designed to help you write commercial fiction. And the best part? There’s a template for it ready to go in Plottr. Repeat after us: “I think I can, I think I can, I think I can, I think I can…”
What is the Story Engines Blueprint Plot Structure?
How did New York Times and USA Today international bestselling fiction author Joe Nassise write more than 40 books in 10 years of publishing experience? Through his Story Engines Blueprint plot structure.
Joe developed the method through his own efforts to produce better — and faster — drafts. The Story Engines Blueprint focuses on seven elements of blockbuster storytelling as its foundation within a four-act overall structure.
This method helps you connect emotionally with readers, and help you as the author produce better drafts.
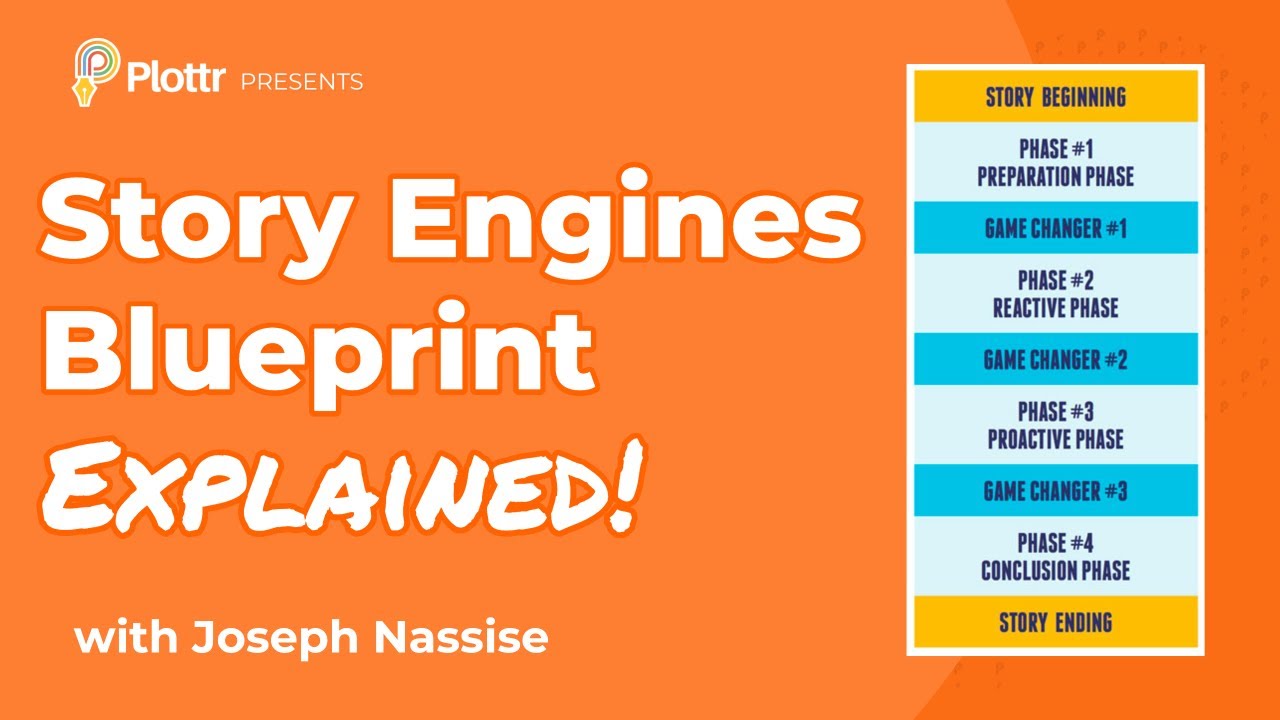
The Story Engines Blueprint uses a four-phase structure designed to heighten the emotional connection between the reader and your protagonist.
Each act or phase exists for a specific reason and pushes the story forward in different, but equally important, ways. The positioning of each phase in the story is as important as their content. If you put the wrong act in the wrong place, you’ll destroy the emotional connection you’re working so hard to build.
Furthermore, each act is tied to the next through a critical transition scene, known as a Game-Changing Moment (GCM.) Each GCM moves the protagonist forward through the revelation of key information needed to reach their story goal. Each GCM also puts them into a new emotional stance that is represented by the action that follows.
Overall, your Story Engines Blueprint should have seven key elements: four distinct phases or acts, along with a trio of game-changing moments.
Watch Plottr Education Lead, author Troy Lambert’s interview with this structure’s creator, and keep reading for a detailed beat breakdown:
Who is the Story Engines Blueprint Plot Structure for?
While Nassise says his method is for a wide variety of fiction, the Story Engines Blueprint probably works best for writers penning thrillers, mysteries, romance, and science fiction.
Plot Points of the Story Engines Blueprint Plot Structure
Let’s get our engines revving with a closer look at each of the four phases or acts in the Story Engines Blueprint.
We’ll use the classic movie Casablanca (because, you know, a train plays a vital part of the plot) to help you visualize how to use the Story Engines Blueprint plot template in Plottr.
Preparation Phase
The preparation phase puts the pedal to the metal to send the story off on a proper start by introducing the characters, the setting, and the stakes.
This can take up to seven chapters as it gives the reader a glimpse into the hero’s life prior to the events that send things spiraling out of the ordinary.
Remember: the more the reader cares about the protagonist and their wants and goals, dreams and desires, trials and tribulations, before the arrival of the central conflict of the story, the more they will care about what happens to them after that conflict appears.
Example: During this act in the film, we meet the protagonist, Rick, and his long-lost love, Ilsa — along with her husband, Victor — in Casablanca, where Rick runs a popular bar. Everyone wants to leave Casablanca to escape the increasing Nazi presence.
Game-Changing Moment #1
After the preparation phase, you’ll have the first game-changing moment to connect the preparation phase to the reactive phase.
This is the first critical moment in the story, where the protagonist can no longer continue doing the same old thing they’ve been doing. What happens will drive them forward into the rest of the tale.
Example: The first GCM comes when a thief gives Rick letters of transit to leave Casablanca to hold for him, but dies without revealing Rick has them.
Reactive Phase
The reactive phase is focused entirely around how the protagonist responds to the conflict that has come roaring up in the first game-changing moment.
Your protagonist knows very little information at this point, and their emotional response to the problem should reflect that. This phase can last up to 10 chapters.
Example: During this phase, Victor tries to buy the letters from Rick, who tells him to ask Ilsa why Rick won’t sell them.
Game-Changing Moment #2
Much like the first, the second GCM transitions the story from the reactive phase to the proactive phase.
At this point, the protagonist learns who or what is standing in their way. From this point forward, your protagonist will make increasingly difficult attempts to reach their story goal.
Example: Ilsa confronts Rick in a cafe after hours, and when he refuses again to sell the letters, pulls a gun on him. But she ends up confessing her love and explaining why she left him in Paris: she’d learned Victor was alive after believing him dead.
Proactive Phase
The proactive phase is that point in the story when the protagonist begins to confront the antagonist with direct thought and action. A new plan of action forms, and the protagonist charges off to see it through.
The proactive phase is all about your protagonist trying and failing and trying again. Each time they attempt to defeat the antagonist, the stakes grow higher, and the tension grows stronger.
Example: Learning the truth about Ilsa’s betrayal of their love puts Rick in a tight spot.
Game-Changing Moment #3
This third GCM transitions between the proactive and the conclusion phase — the beginning of the end.
The hero/heroine gets the final piece of information needed to successfully combat the antagonist. Remember: don’t introduce anything new after this point, as your protagonist should have everything they need to save the day (or fail miserably).
Example: The situation get dicier as the threat of Nazis finding Victor and Ilsa increases. Rick makes a decision on what to do about the letters of transit.
Conclusion Phase
This is the last part of your book; the tracks are heading into the station.
Now, your protagonist summons the courage and personal growth to force their way forward with a solution to the problem before them and, at long last, finally defeat the antagonist and achieve their goal. Or fail one final time, in some spectacular way, if that’s more your story’s style.
Either way, the conclusion could last seven or more chapters — whatever you need to wrap things up and provide a satisfying ending to your story.
Example: Rick puts his plan into action to save Victor and Ilsa—and perhaps his very soul as well.
How Do You Use the Story Engines Blueprint Plot Structure in Plottr?
Let’s get your story’s engine going with these simple steps. First, make sure you have an active Plottr membership or start a free Plottr trial and install Plottr (or use it in your web browser with Plottr Pro).
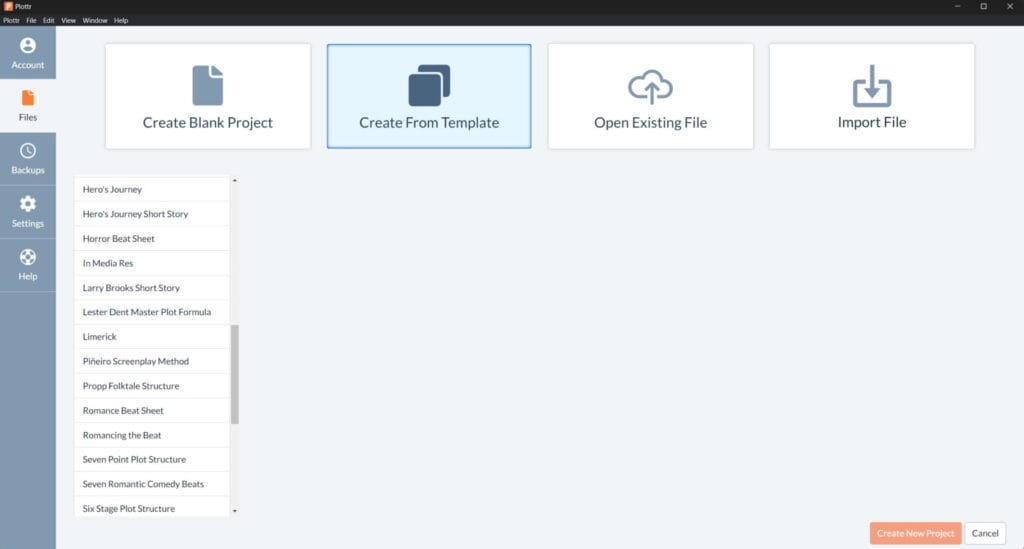
- Step 1: From the Plottr Dashboard, select Create From Template
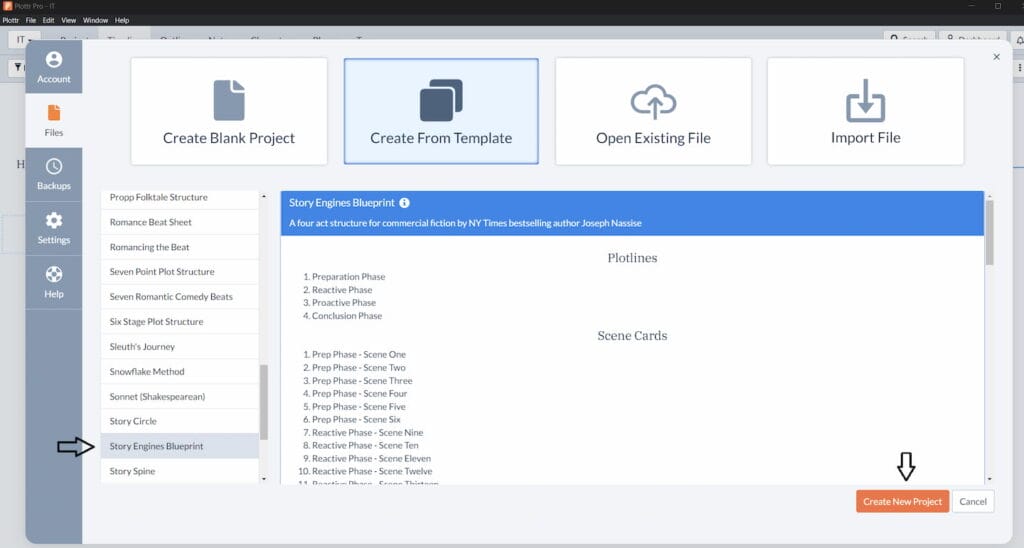
- Step 2: Select the Story Engines Blueprint template from the template sidebar. Then click on Create New Project
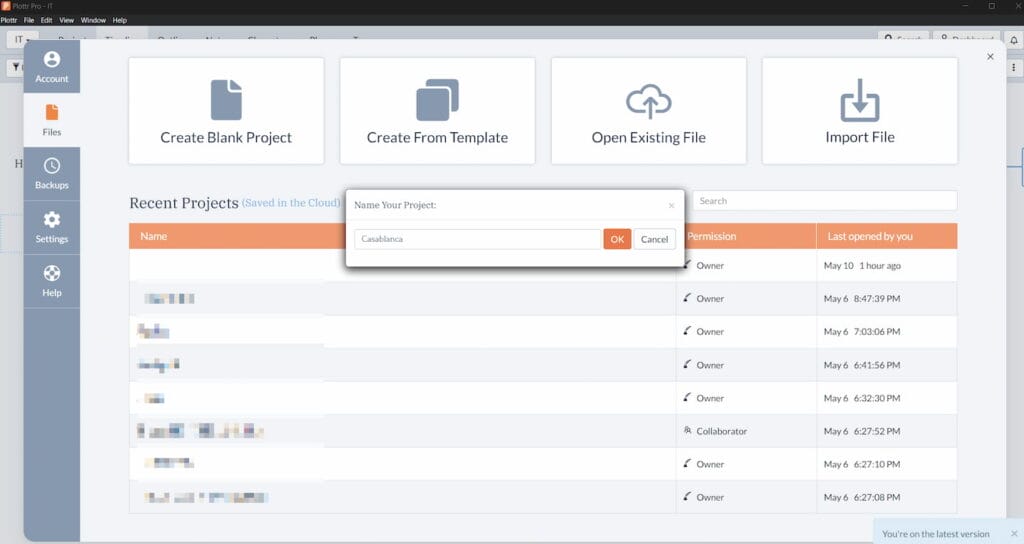
- Step 3: Give your project a name. Once saved, the project will be included on your list of projects so you can return to it at any time
- Step 4: Your timeline is now open and ready to be modified. If you want to see your entire timeline in a smaller view, click the M in the top navigation (you can switch back to the more zoomed in view by clicking L)

- Step 5: Hover over each scene in your timeline to view details about the type of action and the content for each beat
- Step 6: If you click on a scene card, you’ll be able to reference or alter the pre-loaded content and add your story’s plot points above the description
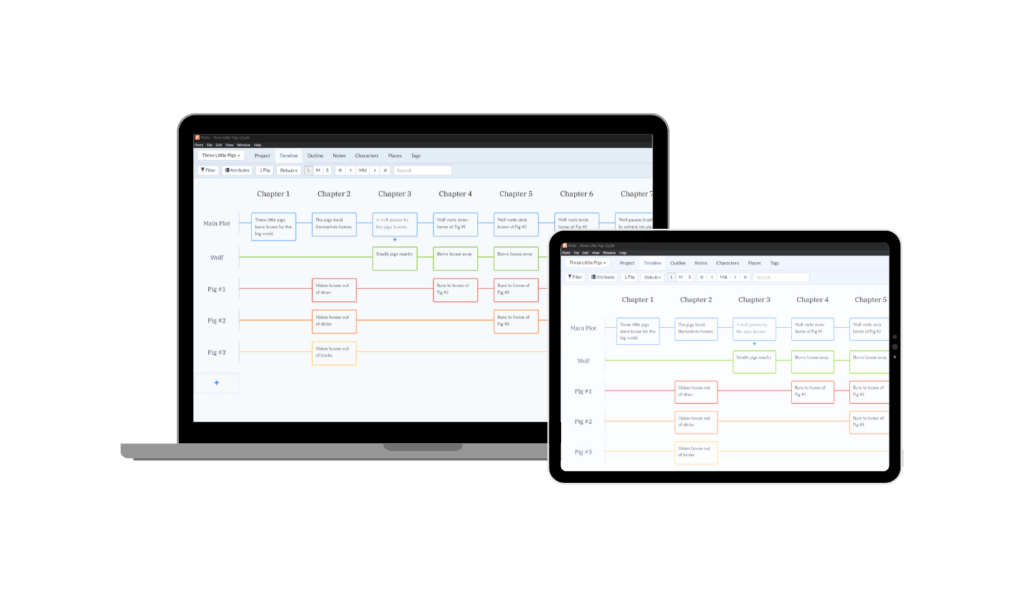
You can merge more than one plot line template at a time in Plottr. If you want to create an additional plotline, click the + symbol you can see bottom left in the image above. Then select a template. The Story Engines Blueprint template goes well with these other structures, also available in Plottr:
Rev Up Your Writing With the Story Engines Blueprint
Ready to rev up your writing? Start your free Plottr trial now and let us know how you found this method in the comments below.


1 thought on “Story Engines Blueprint Plot Template: Blockbusters Simplified”
Great insights, your article was incredibly informative and well-researched. Keep up the excellent work!