Does your story have a spine? Or is your plot flip-flopping around? A strong story spine helps your plot make sense and soar. The Story Spine plot template helps you expand “Once upon a time” into a full narrative. Read on for how the Story Spine structure can help you plot like a Pixar writer.
What is the Story Spine Plot Structure?
In 1991, playwright Kenn Adams created the Story Spine plot structure for writers and performers to develop fascinating stories for their audiences. He later expanded on this structure in his best-selling 2007 book, How to Improvise a Full-Length Play: The Art of Spontaneous Theater.
In 2012, the Story Spine method skyrocketed into popularity when former Pixar storyboard artist Emma Coats tweeted 22 tips for better storytelling. The tweet, which went viral, included the Story Spine structure, which became the most popular of the writing tips. In fact, Disney, Pixar, and Lucasfilm use the structure to train all new writers.
Who is the Story Spine Plot Structure for?
Wondering if this method might be as useful for you as it is for the writers at Disney?
Keep in mind that this plot device is used to develop a story’s main spine, not the entire storyline. For this reason, it’s a helpful and adaptable starting point for writers of many styles and genres.
The Story Spine structure begins with “Once upon a time,” but don’t think of it as only for fairytales. Writers of romance, adventure, thrillers, and science fiction will most benefit from using the Story Spine structure.
Watch Plottr Education Lead, author Troy Lambert, talk through the Story Spine template in Plottr. Keep reading for a quick rundown of the relevant beats:
Plot Points of the Story Spine Plot Structure
This simple yet powerful outlining tool will help you craft the perfect spine for your story.
The structure has eight sections meant to build the backbone of your plot. Let’s walk through each of them here.
To show you how the Story Spine Plot Structure Template works in Plottr, we’ll use the animated classic movie, The Lion King (1994), as an example.
Beat #1: Once Upon a Time…
This is the classic fairy tale opening, but you don’t need to use those exact words to craft your story. The idea is to set the scene. In this first section, you’ll create the beginning of your story, introducing the reader to your protagonist and story world.
Example: The story opens with the birth of an heir to the Pride Lands: a cub named Simba. It’s a bountiful setting with an entire kingdom to be enjoyed, and Simba’s arrival is celebrated by a parade of animals, as well as his fellow lions.
Beat #2: Every Day…
Now you provide more details and introduce the obstacles your protagonist will face in fulfilling his destiny.
Example: As it turns out, not everyone is happy with the new arrival. Hints of unrest are shown with Simba’s uncle, Scar, as he reacts to a youthful Simba arrogantly exploring his future kingdom.
Beat #3: But One Day…
Something happens to your hero or heroine that changes everything; it’s the event that pushes them to embark on a quest or fight to keep the status quo of the world they love. In other words, this is the inciting incident.
Example: For Simba, the inciting incident is the tragic death of his father, Mufasa, for which he is unfairly blamed by Scar (and himself).
Beat #4: And Because of This (part 1)…
We’re entering the second act of the story — the meat of the tale. The protagonist also encounters more obstacles and begins to grow and change as a result of their adventure.
Example: Scar exiles Simba from the kingdom, and the half-grown cub finds companionship with two friends. After a few years of living a carefree life, Simba encounters a lioness from his kingdom (Nala) who tells him of the suffering the pride and other animals have endured under his uncle’s rule in the Pride Lands.
Beat #5: And Because of This (part 2)…
Part one leads to a new, more challenging set of obstacles. The tension should increase and the stakes are raised higher. Readers should doubt whether your hero/heroine will succeed.
Example: At first, Simba wants nothing to do with helping his people, but when his father appears to him in a dream begging him to return to take his rightful place as king, Simba sets out with his friends.
Beat #6: And Because of This (part 3)…
Challenges and complications continue piling up, becoming more and more dangerous and difficult for the protagonist to overcome. The hero/heroine now faces a final hurdle, bigger than any of the previous ones — and the outcome is uncertain.
Example: Simba reaches the Pride Lands, where his friends help him get past his uncle’s guards. Seeing the injustice for himself and convinced he should take his rightful place as king, Simba now changes his goal to confronting Scar and goading his uncle into admitting he killed Mufasa in a ploy to obtain the crown.
Beat #7: Until Finally…
This is the story’s climax — what you’ve been building up to since the beginning. The story’s solution is set into motion.
Example: Scar blames his brother’s death on the hyenas, trying to trick Simba. But Simba had been prepared for the duplicity and they engage in battle. Scar ultimately falls off a ledge, into a pit where betrayed hyenas are ready to attack — resulting in his death.
Beat #8: And Ever Since That Day…
After the climax, the final scene reveals the final resolution — the reward for all the protagonist went through to get to this point. In other words, it’s happily ever after for the hero/heroine.
Example: With Scar dead, Simba takes his rightful place as king and fulfills his destiny to bring prosperity back to the once-thriving kingdom.
How Do You Use the Story Spine Plot Structure in Plottr?
To start your own “Once Upon a Time …” spine, follow these six easy steps. (Make sure you have an active Plottr subscription or a free trial ready to get you started!)
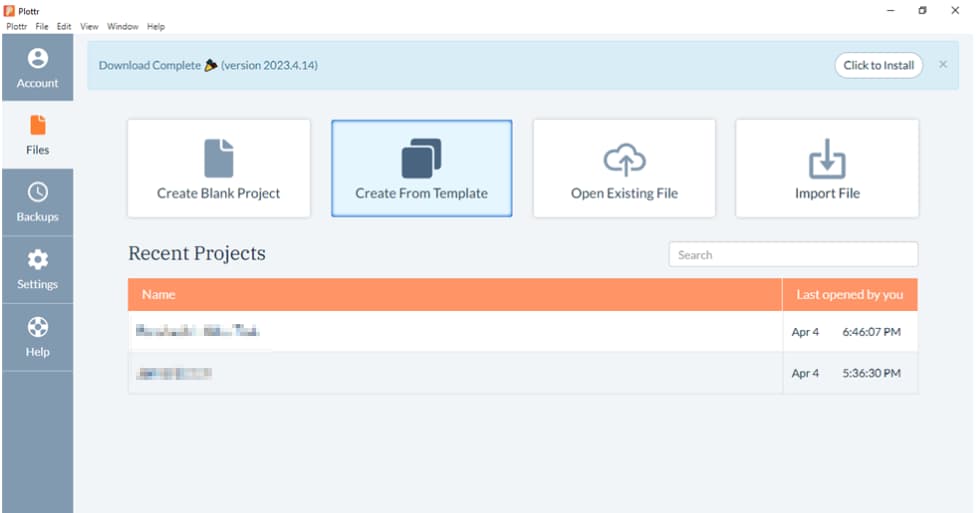
- Step 1: From the Plottr Dashboard, select Create From Template
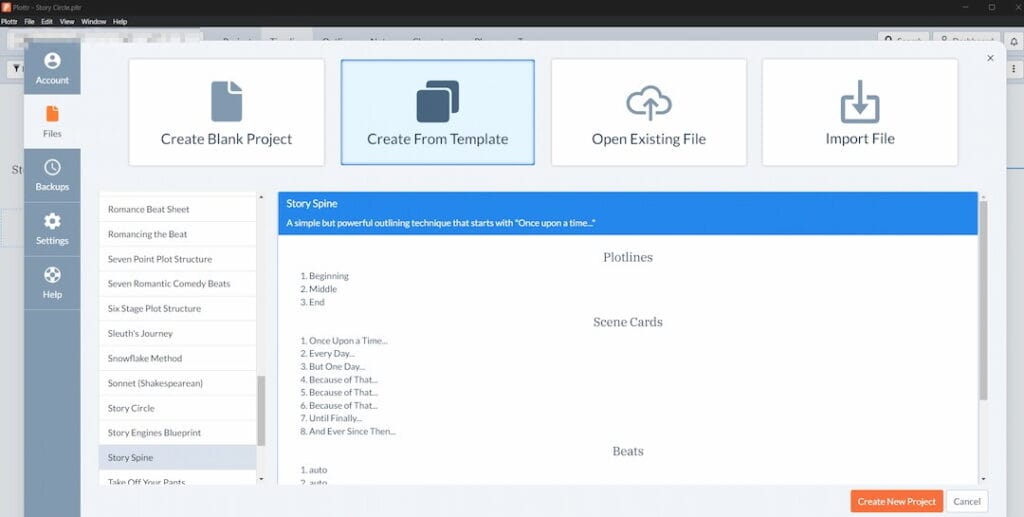
- Step 2: Select the Story Spine template from the template sidebar. Then click on Create New Project
- Step 3: Choose where to save your project and name it. Once saved, the project will be included on your list of projects so you can return to it at any time
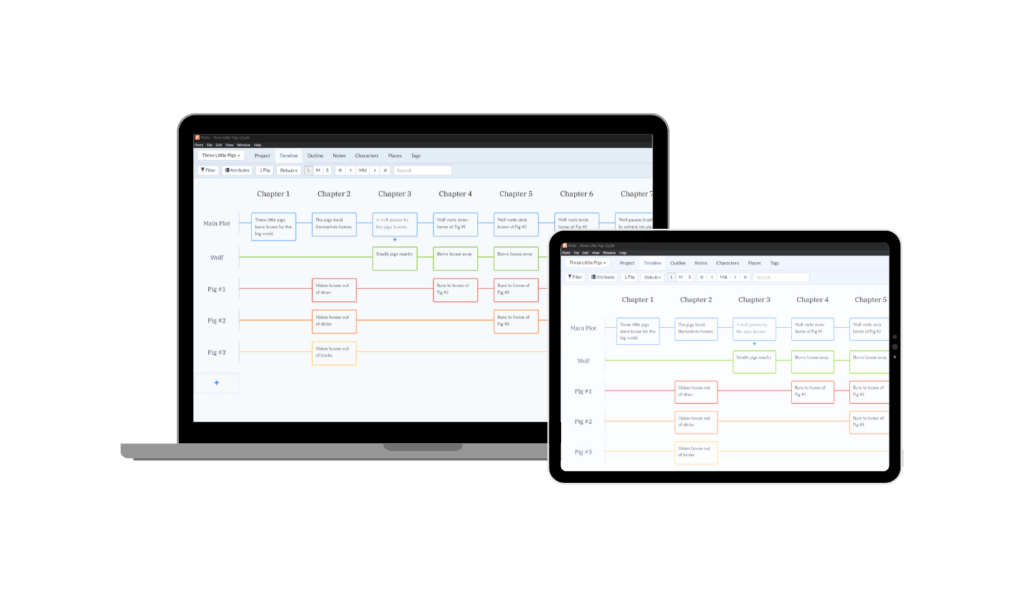
- Step 4: Your plotline will now be open, showing the Story Spine beats
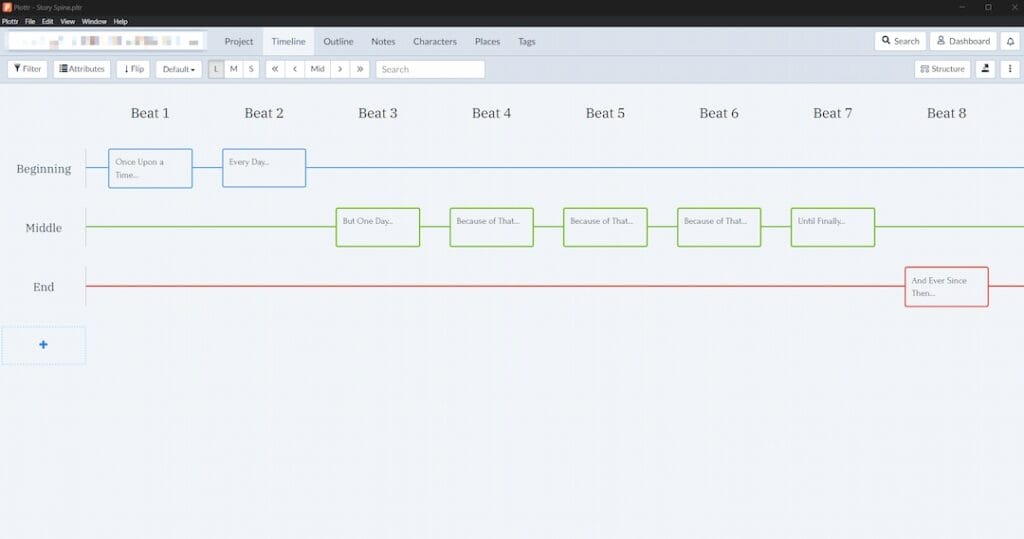
Pro tip: To see the entire timeline at once, select the M, or medium, view, which will condense the beat boxes and give you more of the plot line in one window.
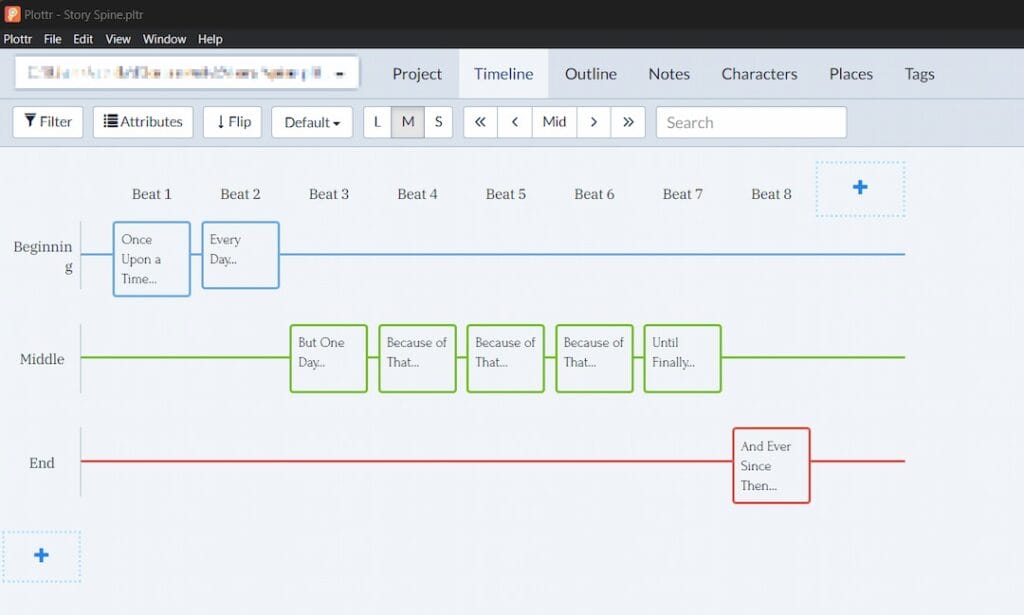
- Step 5: Hover over each scene in your timeline to view details about the type of action and the content for each beat
- Step 6: If you click on the beat box, you’ll be able to reference or alter the pre-loaded default content and add your story’s plot points
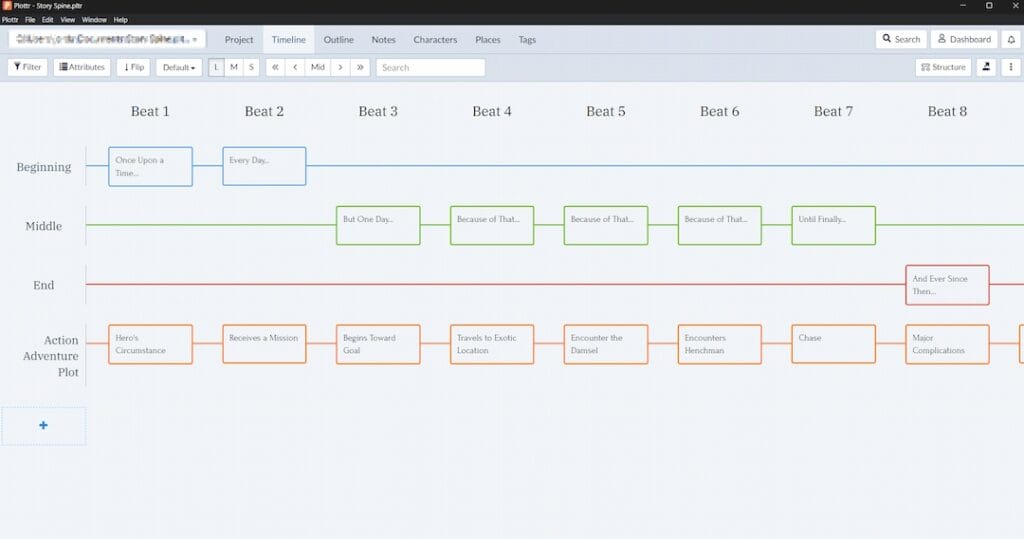
You can merge more than one plot line template at a time in Plottr. For example, the Action Adventure plot might make a nice complement to the Story Spine structure. Hover over the + on the left-hand side of the screen and pick Use Template on a new timeline to build parallel plotlines and subplots.
Other parallel plot structures you could try:
Start with Once Upon a Time
Ready to write a story with real backbone? Start your free 30-day trial now.
Check out the Story Spine Plot Structure Template in Plottr to get started, and join us for free Plottr tutorials every Tuesdsay. Let us know what you think in the comments!



Comments