A story outline is like having a pocket map for a new city, marked with every place worth visiting. Your story’s arcs and subplots become routes you know well even before you start drafting. Keep reading to learn how Outline V2, introduced in Plottr v2024.10.9, will help you outline books and stories as you visualize and rearrange plots better.
What is Outline V1 in Plottr (Now Called Legacy)?
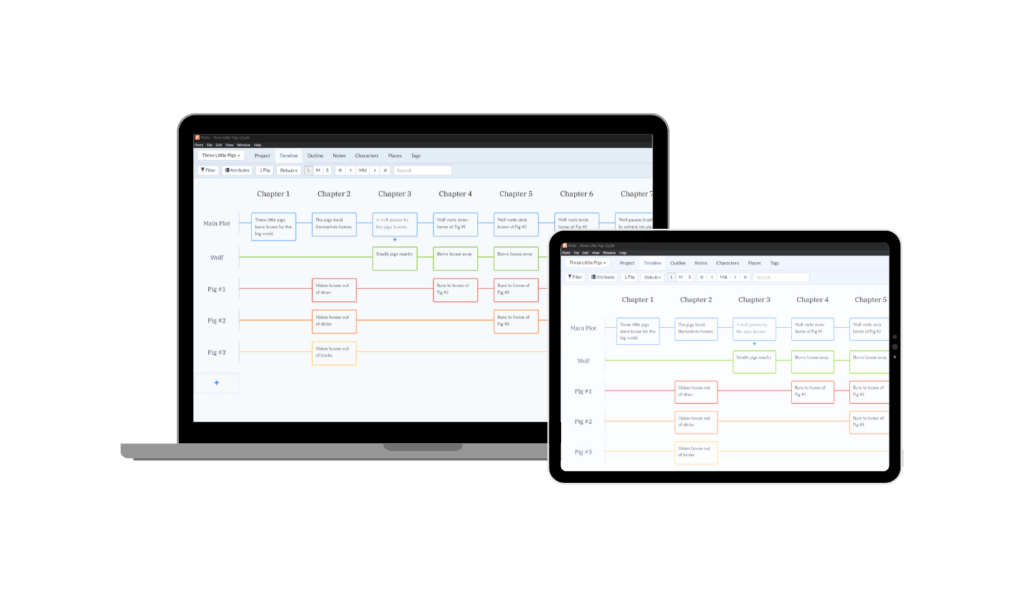
The pre- October 2024 version of the Outline tab in Plottr (Legacy view) looks like this:
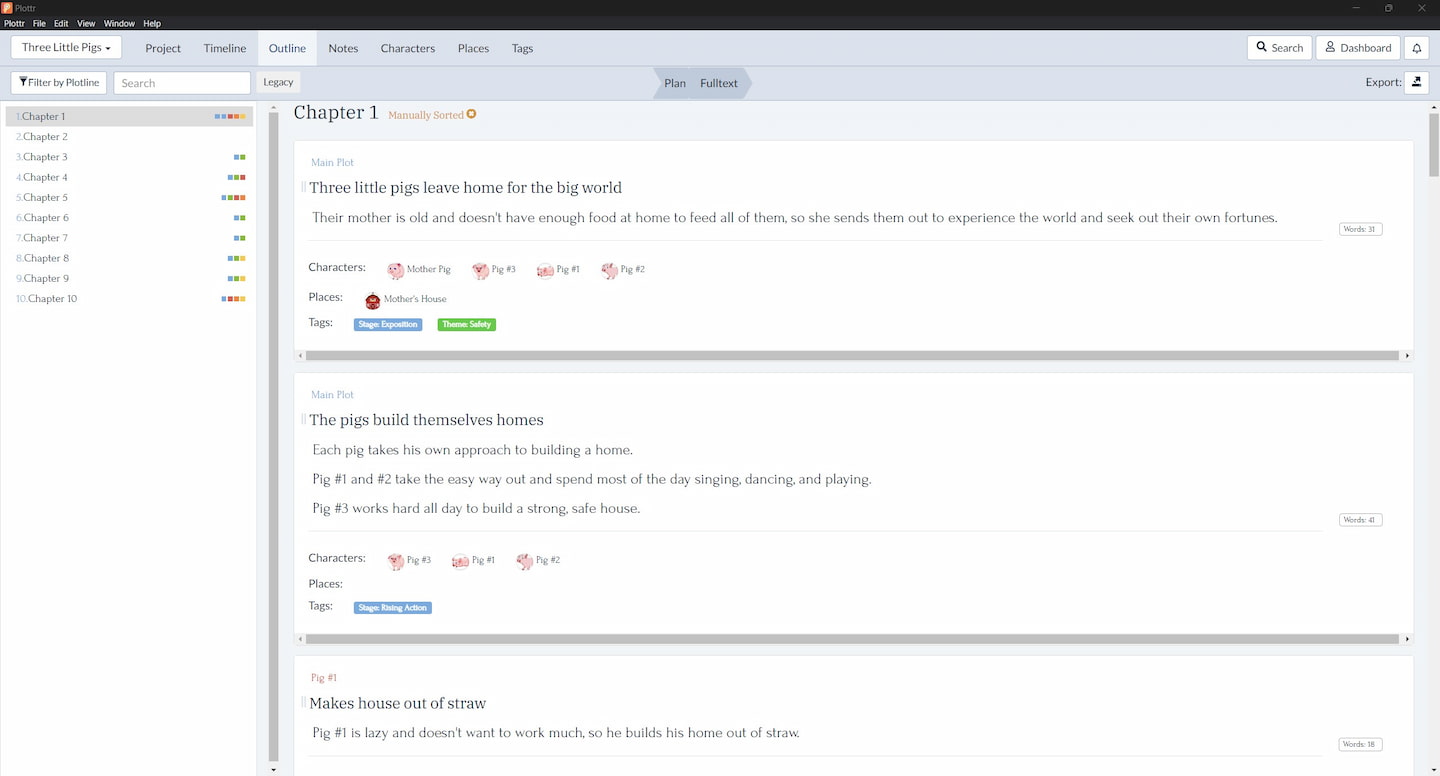
In this view, you see a continuous outline of story elements you’ve planned in the Timeline, Characters, Tags and Places tabs, including:
- Chapter or story unit titles
- Plotline names and colors
- Characters, places and tags added to each chapter or story unit
- Word counts for each scene summary
You can switch back to this older version any time: Just click Legacy in the top ribbon while in the Outline tab in Plottr.
How Does Outline V2 Help You Create a Story Outline?
Outline V2 in Plottr introduces two new tabs within Outline: Plan, and Fulltext. Keep reading for a detailed breakdown of what you can do with each of these tools.
You can also watch the full release notes on Plottr’s YouTube channel (remember to subscribe afterward!)
Plan View: The Colorful Way to Outline Books and Stories
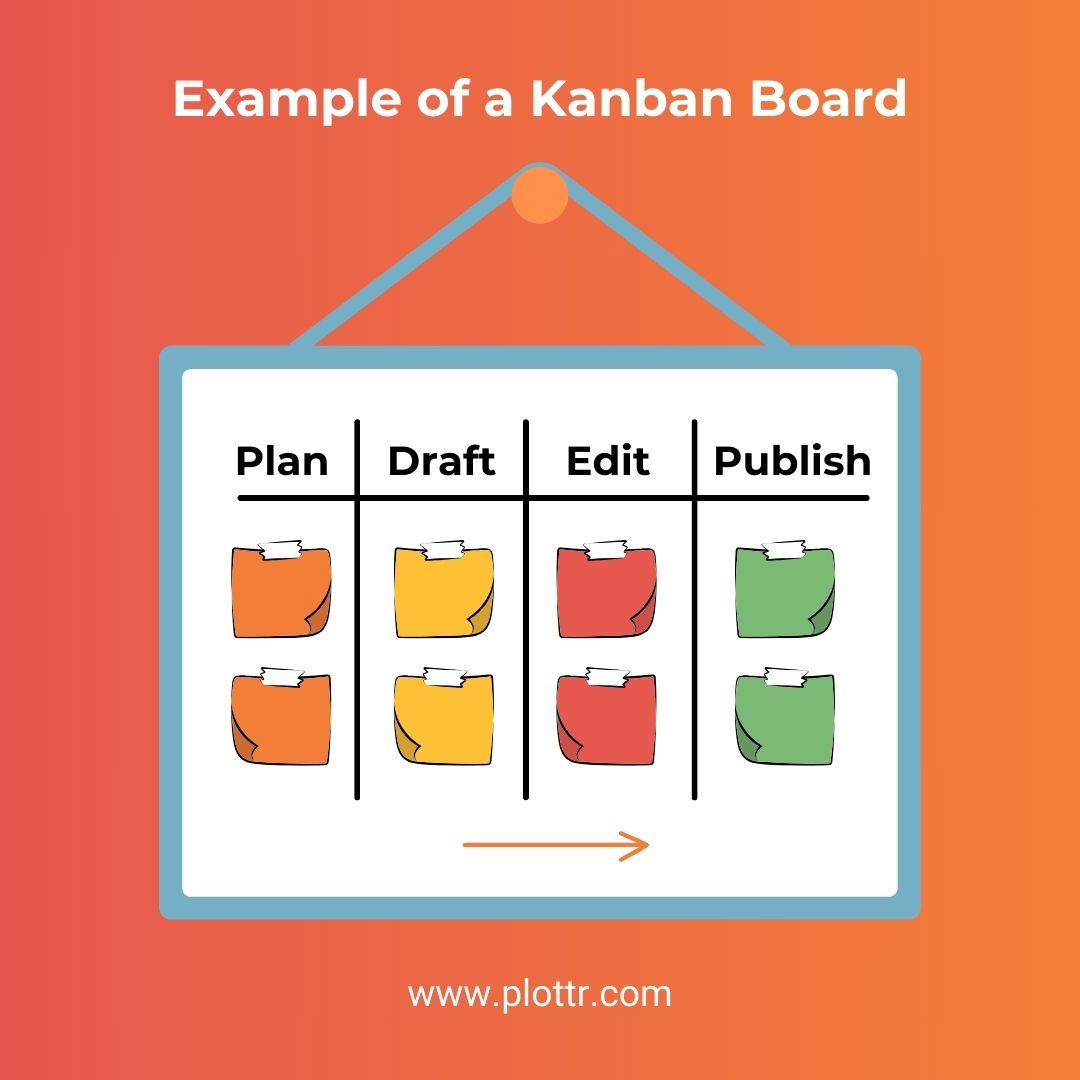
Plan view in Plottr is a little like a Kanban board for sequencing and rearranging story events.
A Kanban board is a tool used to map the flow of tasks or events, placing cards or sticky notes on a board that can be moved between columns with headings. For example, “Plan,” “Draft,” “Edit,” “Publish.”
Here’s an example of how the Three Little Pigs Plottr demo looks in Plan view:
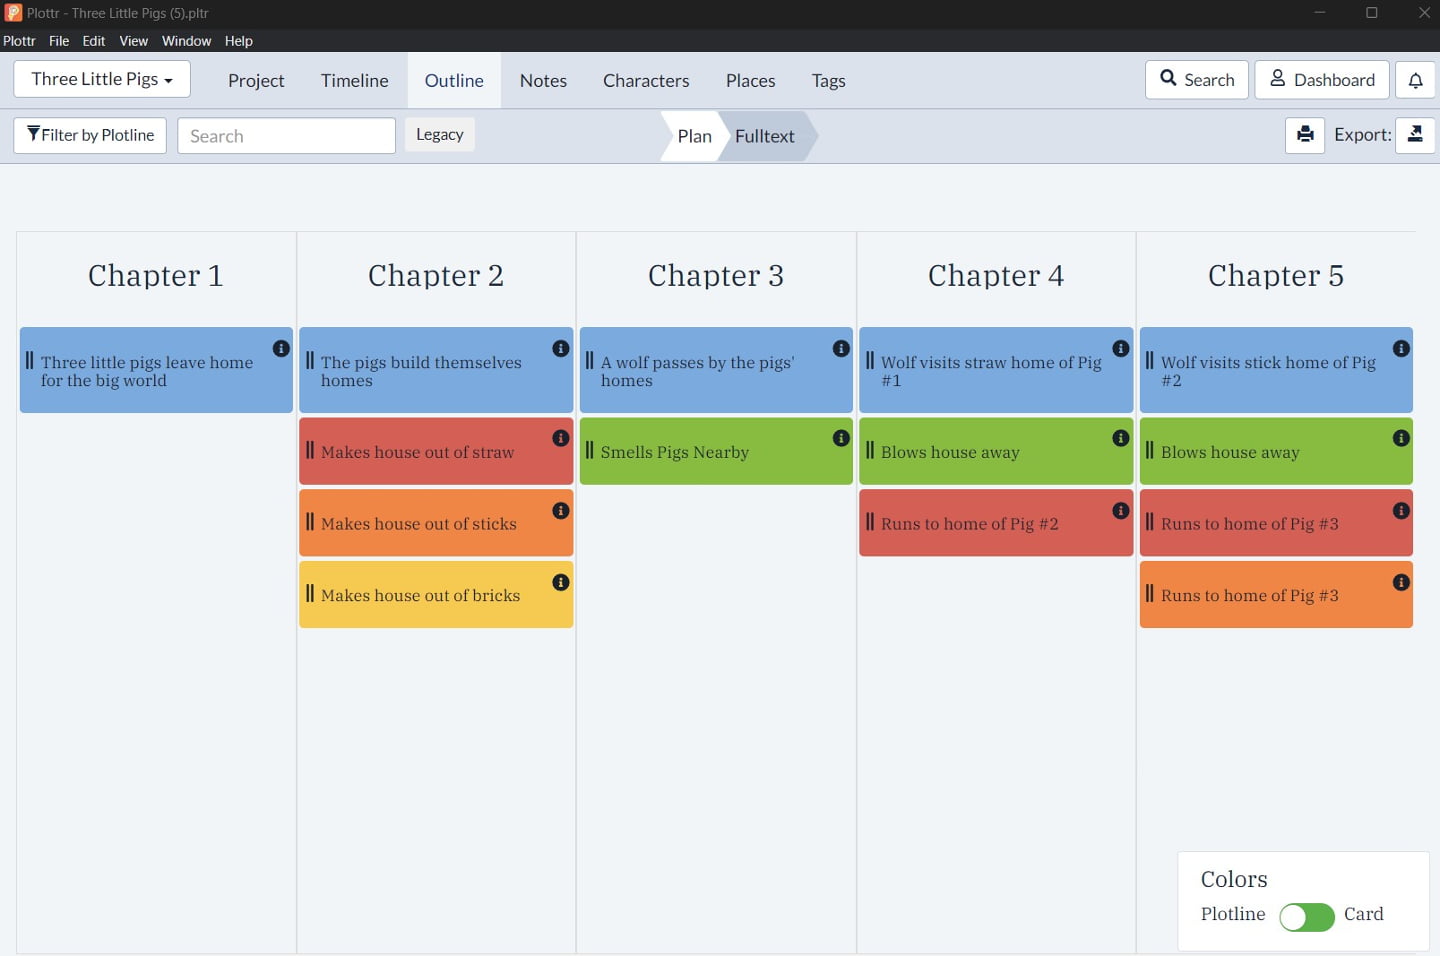
You’ll see it’s a useful step in how to create a novel outline. After the Timeline tab’s process of brainstorming scenes and chapters, you can arrange scenes and beats within those chapters.
Hover over the i information icon to see the text within any card. When you hover over the bottom-right corner of a card, you’ll see two diagonal arrows. Click those to expand the scene card and edit it directly from Plan view.
Please Note: Sorting cards within the same chapter or story unit will not move your cards in the timeline. Moving cards from one chapter to another will move your card to the chosen chapter column.
How to Sort, Rearrange and Filter Scene Sequence in Plan View
Sorting Scenes or Beats in Each Story Unit
In the example above, you see plan cards that match the scene cards from your plotlines.
Plotlines appear by default in the same order as shown in the Timeline tab. So you see:
- The topmost plotline, the main plotline, as a row of blue cards (inheriting that plotline’s chosen color)
- Pig #1’s scene cards in red (their plotline’s color)
- Pig #2’s scene cards in orange
- Pig #3’s scene cards in yellow
- The wolf’s scene cards in green
You can drag and drop the cards vertically to rearrange the sequence of events in each chapter. They will appear in this new order when you switch to Fulltext or Legacy views. This means you can outline books in whichever view suits your workflow best.
When you sort the cards in a chapter or other top-level story unit, Manually Sorted will display under the column’s title. Click the X to return the cards to the original order.
Stacking Scene cards from Plan View
What if you decide you want to have two of a plotline’s events unfold in the same chapter?
For example, you want your three little pigs to leave home for the big world and build their homes in Chapter 1:
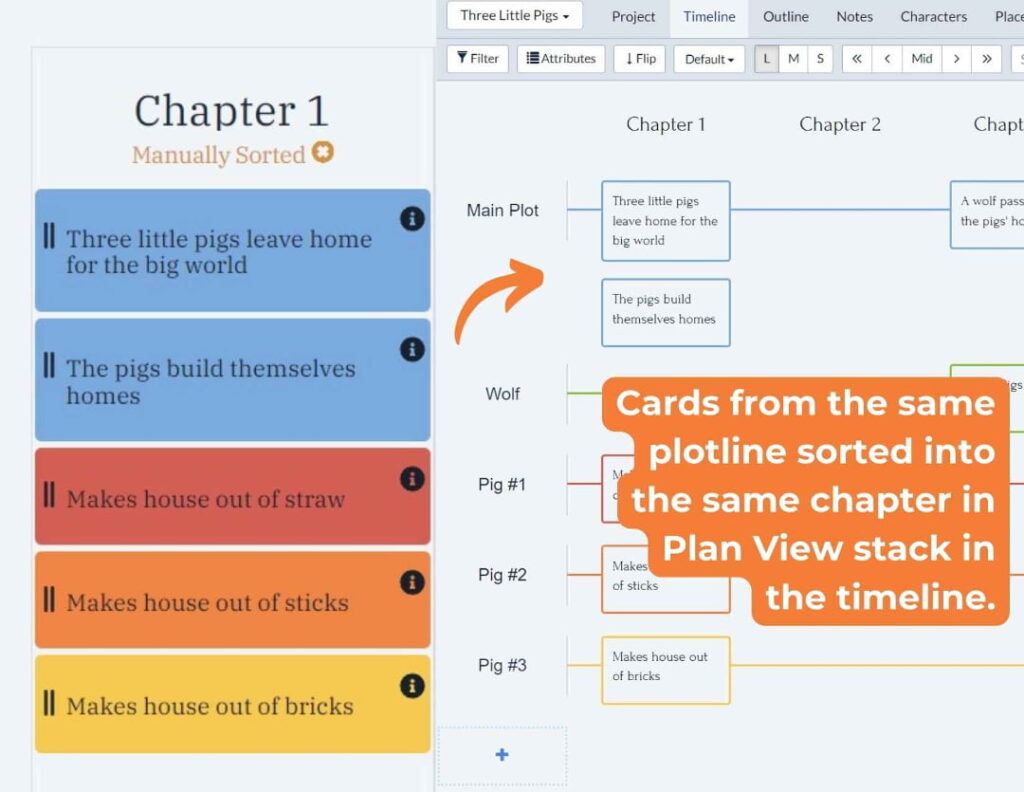
Cards from the same plotline sorted this way will appear as stacked cards in the Timeline tab.
Pro Tip: Click the title of any scene card in Plan view to rename it. Your story unit’s name will update in the Timeline tab too.
How to Filter the Plan View in Plottr
Like in the Legacy outline view in Plottr, you can filter Plan view by plotline. This is a powerful way to focus on one character’s story arc (or one subplot or B-story) at a time. For example, here, we’ve filtered to only show the wolf’s scenes:
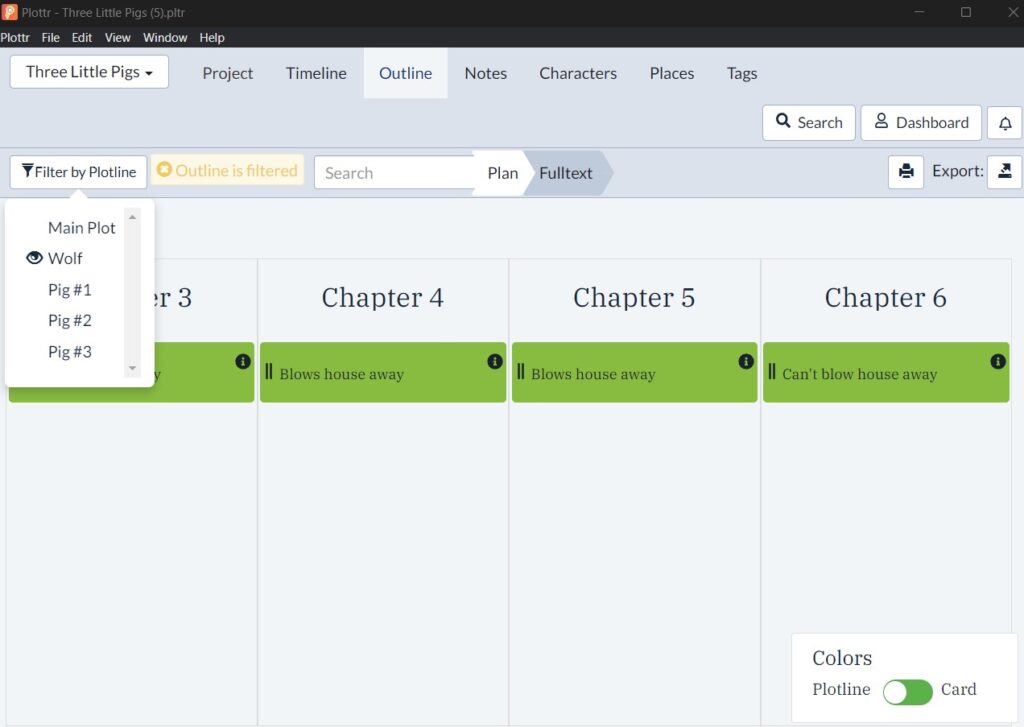
How do you know which storyline or POV you’re looking at in Plan view, and whether it’s filtered or not?
- When you have any filtering applied, Outline is filtered displays next to the Filter by Plotline dropdown
- When you click Filter by Plotline, the eye symbol in the dropdown appears next to any plotlines you’ve chosen to display
- Click anywhere in the Outline is filtered tag to return to your unfiltered story plan
Toggle Between Plotline and Individual Card Colors
Another useful feature of Plan view when outlining books is the Colors toggle. It’s set to show colors of individual plotlines set in the Timeline tab by default. This way, when you move things around, you can still see which scene summary belongs to which plotline or viewpoint character.
Click the toggle to Card, and you’ll see the colors set (if any have been) for scene cards individually. This way, you can switch between views to see at a glance:
- Which scenes are in which characters’ POVs and which scenes you’ve colored according to your writing process (e.g. Green for “Written,” Red for “To Edit”)
- Which scenes belong to which subplots, or which scenes you’ve colored to reflect a specific theme, tempo/pace, type of conflict present in the scene, or other story aspect
Color-coding in Plottr is still a flexible tool for visualizing your whole story clearer than ever!
Exporting Your New Story Sequence
So you’ve used the Timeline and Plan views to create a story outline and reorder events just the way you want. What next?
At this point, you can export your reordered story sequence directly as an MS Word or Scrivener file. You can even print the plan view board to PDF or paper (just click the printer icon top right).
There’s another helpful step you can use after you create a story outline in Plottr. We call it Fulltext.
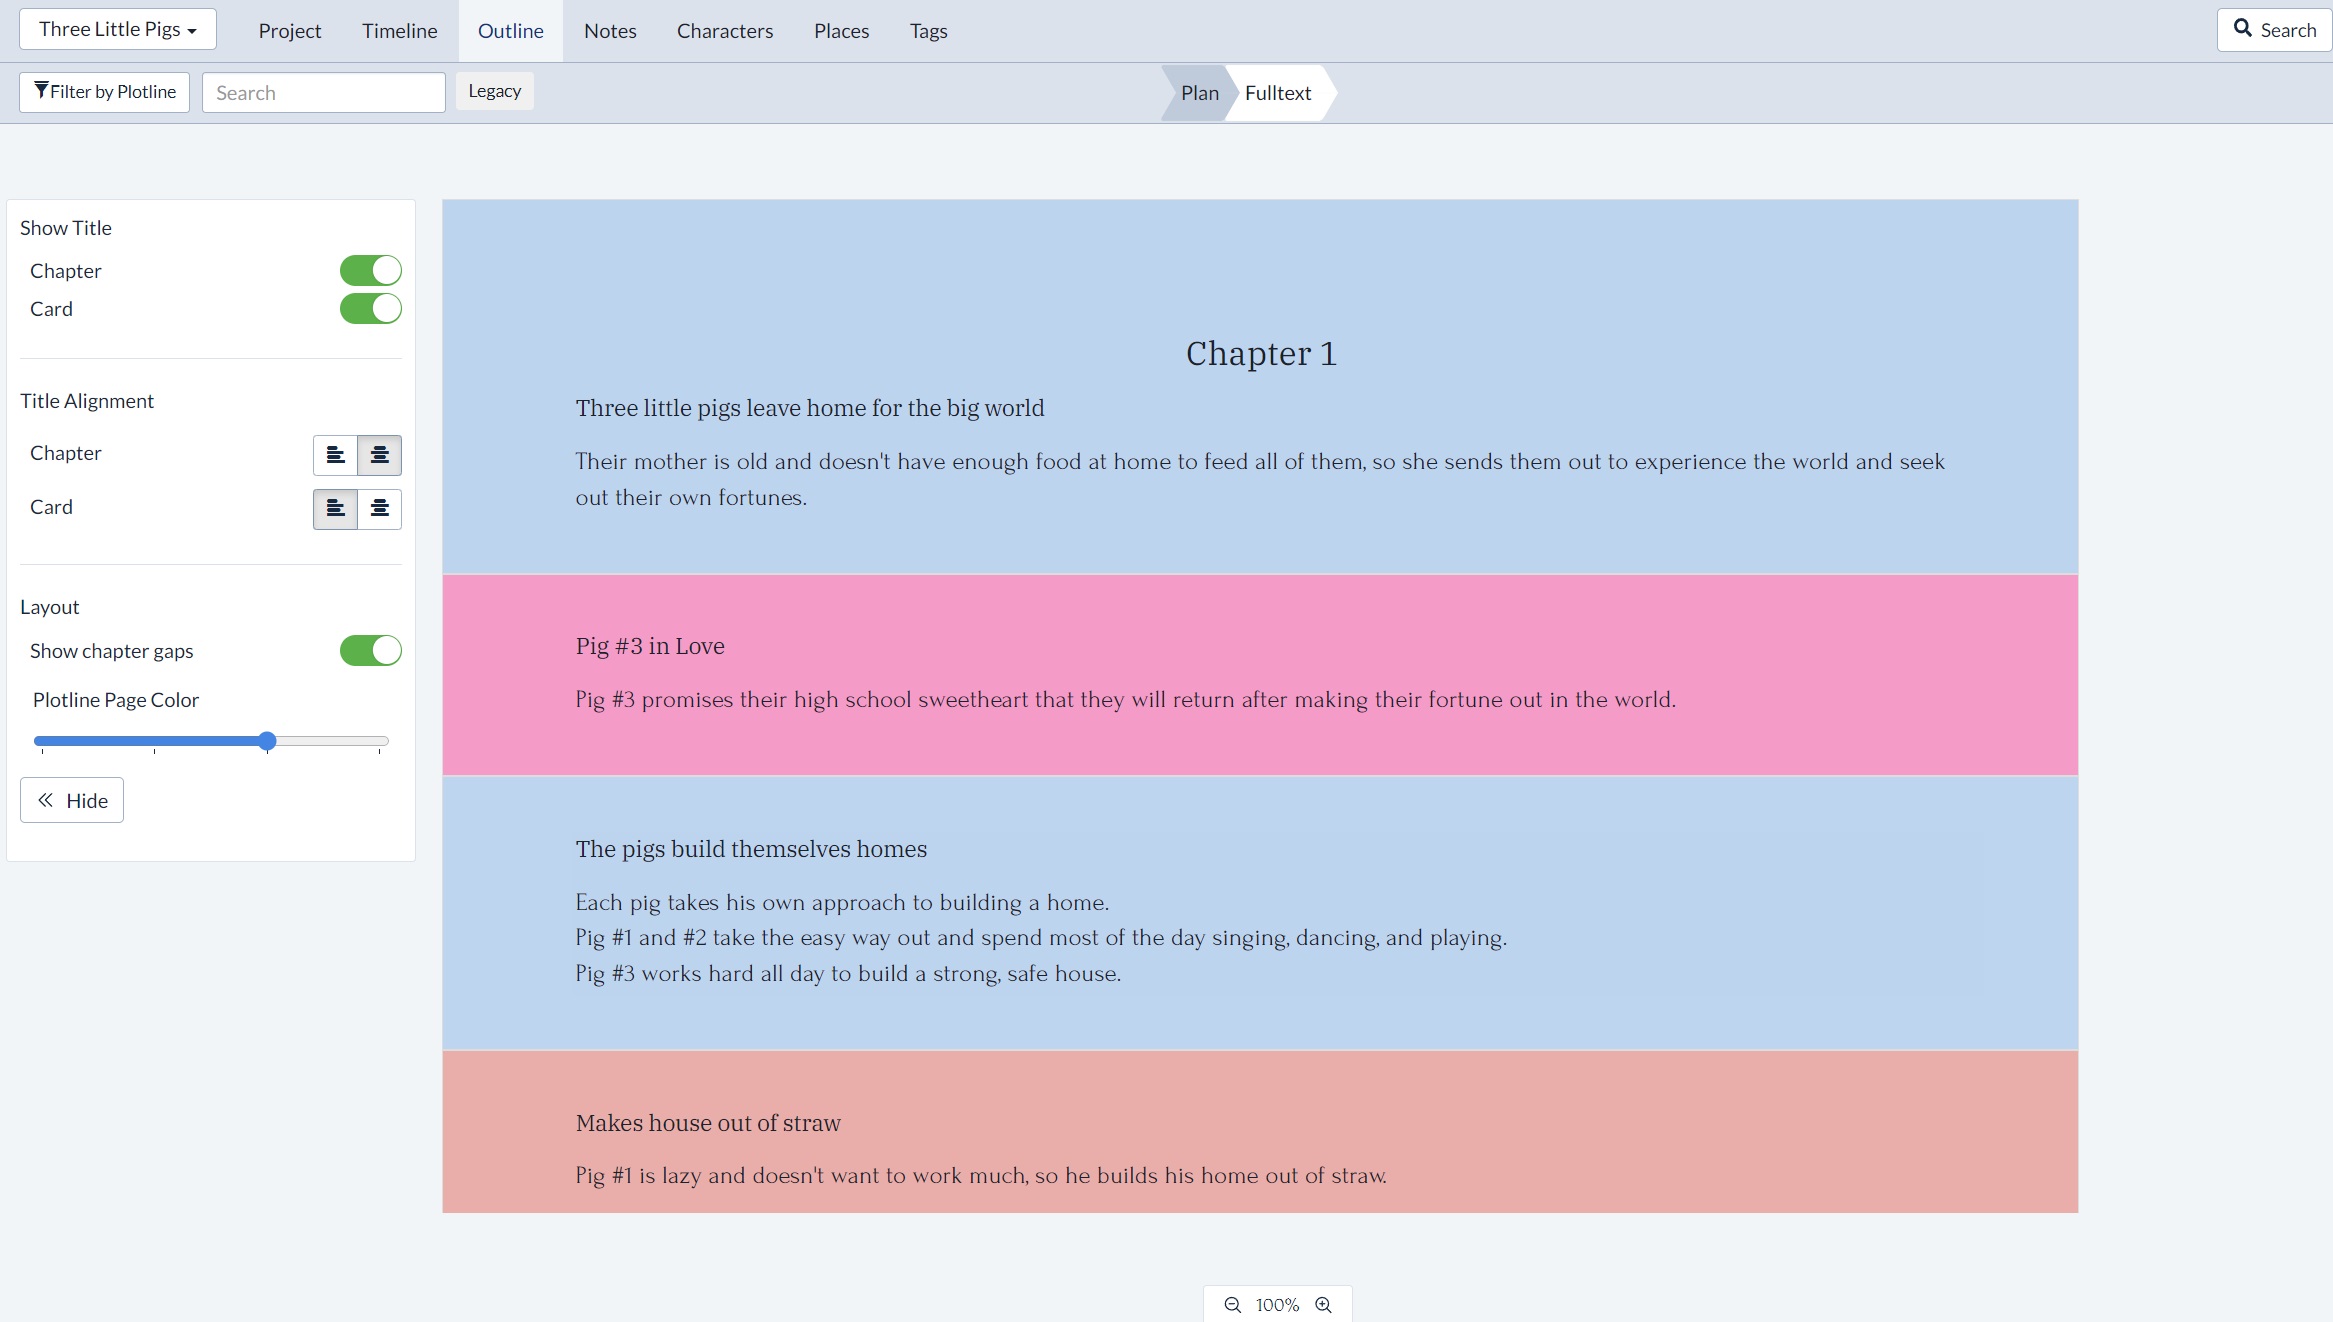
Fulltext View: Focus on Your Story
Fulltext view in Plottr, also introduced in v2024.10.9, helps you see (and adjust) the big picture.
In this view, you’ll see a cleaner, word processor -like layout of your full outline (more stripped down compared to Legacy view). The left sidebar gives you toggles, buttons and sliders to:
- Show or hide chapter and card titles
- Align chapter titles and card text left or center
- Show gaps between chapters or turn off gaps to see your full outline, condensed
- Use the Plotline Page Color slider to set the intensity of a background color taken from each story segment’s plotline
- Use the zoom controls (bottom middle) to fill your viewport with your outline if you want, hiding the layout and color controls
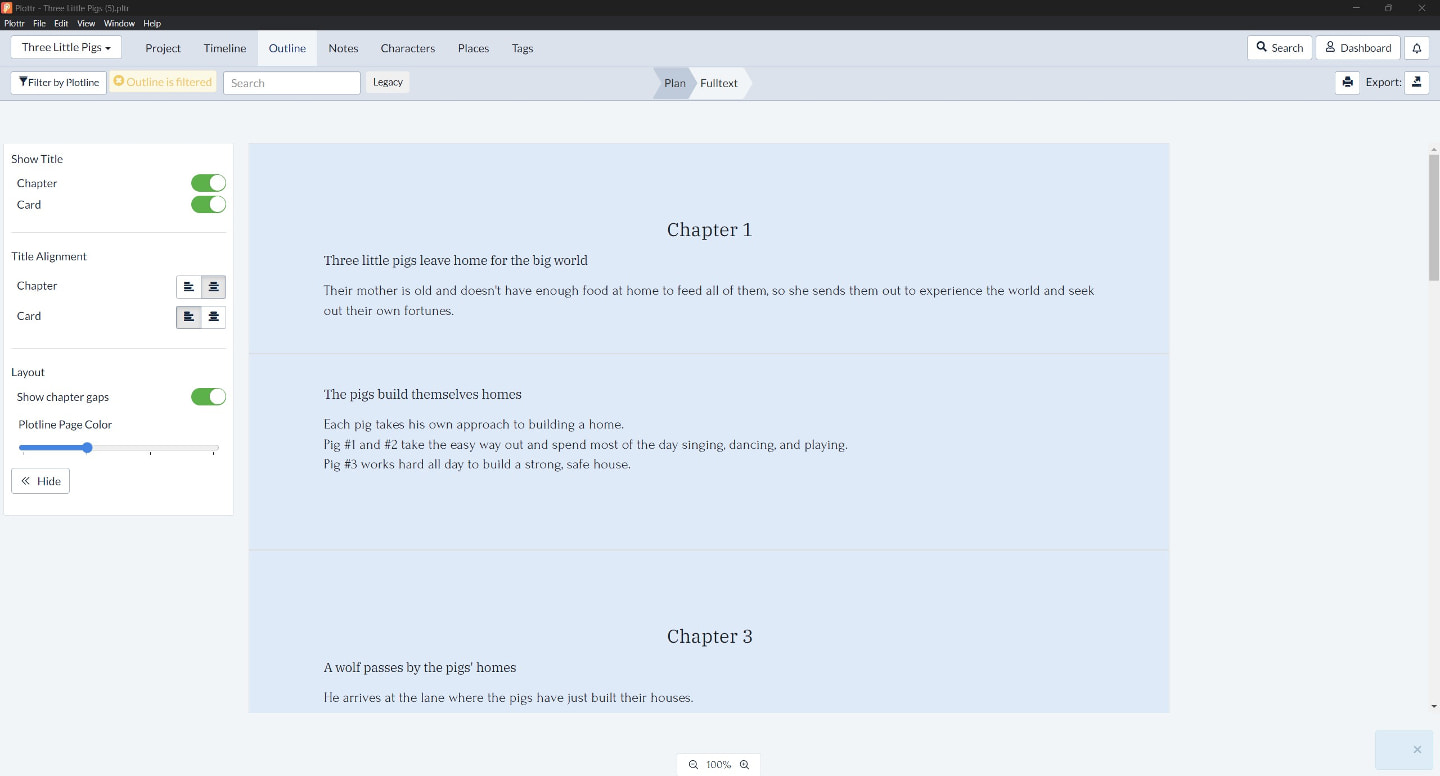
Color-code Plotlines and See Them at a Glance in Fulltext View
This is where color-coding gets fun! Say you’ve created a plotline for a romantic subplot and colored it red (example: Pig#3 in The Three Little Pigs says goodbye to their childhood sweetheart).
Now you can see in Fulltext exactly where core moments related to this plotline appear, just from page background color you can toggle on or off.
Filter by Plotline to Focus on One Arc at a Time
Just like Plan view, you can filter your Fulltext as you outline books by plotline:
- Click Filter by Plotline top left
- Select the plotline you want to display (for example Main Plot)
- Like in Plan view, the eye symbol will show next to the name of the plotline you’ve chosen to display
- Click anywhere in the Outline is filtered tag to remove all filtering (or toggle individual plotlines on or off from the dropdown when you click Filter by Plotline again)
Print your Fulltext Pages, Filtered or Expanded
Like the Plan view, you can print the Fulltext view, either filtered to show only specific plotlines (such as your main plot summary), or all cards’ text and titles. To print:
- Click the Print icon top right, next to Export
- Choose the printer you want to use (or print to PDF)
- Name and save your file (if printing to PDF)
Get Creative with Plan and Fulltext Views in Plottr
The examples listed here focus on fiction, but you can use these flexible outlining tools for a host of other purposes. For example:
- Create a marketing plan with a Kanban board -like workflow
- Make your own project management file for tracking project to-dos
- Track research and other sequential tasks with notes, links and more
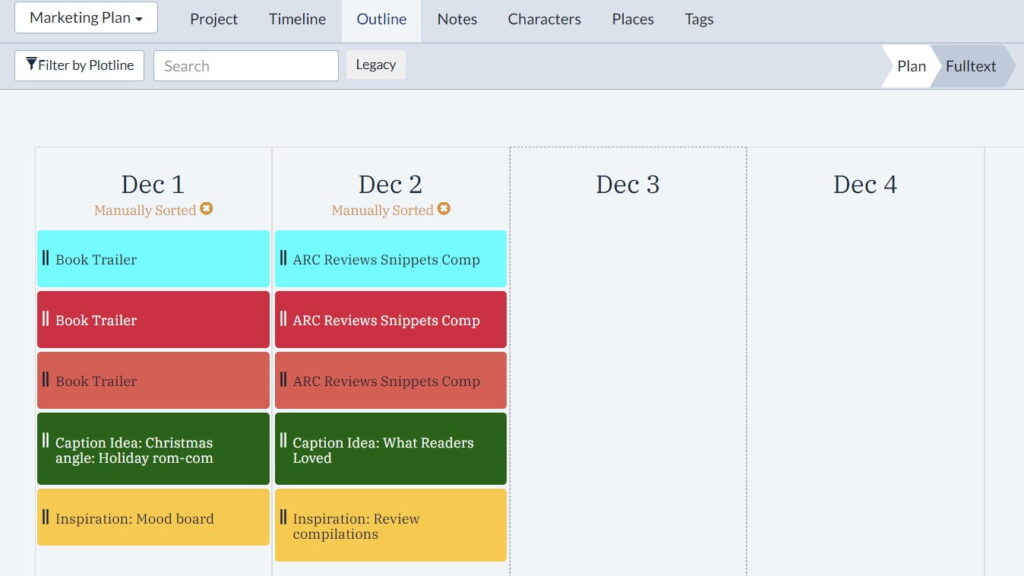
with extra plotlines for caption ideas and visual reference/inspiration links.
Pro Tip: In the Timeline tab, click the Structure button and rename units at the Chapter level with an abbreviation of the month (like “Dec” in the image above). This helps you create a calendar template for project-tracking faster, without having to rename each new column you create.
That’s it for this deep dive on Outline V2! Explore other features with these 101 level guides:
- Color-coding in Plottr
- Creating Custom Scene and Character Templates
- Importing from Word into Plottr
Ready to Write a Better Story with Outline Tools?
Knowing how to outline a story plot comes with experience – but flexible outlining tools help. Start now with a free Plottr trial.
Let us know in the comments what you think of this release, how you plan to use these tools, or any other feedback!

Comments