A scene is your novel in miniature. Your novel needs a trigger event or inciting incident, pinch points, and a climax, and so do your scenes. You may already be familiar with the W Plot Method for planning entire books. How do you use the W plot method for scenes? With Plottr’s W Scene template. Keep reading to learn how it will help you keep readers hooked.
What is the W Scene Template?
While there’s no official creator of the W Plot Method, it’s generally agreed that it was outlined by Mary Carroll Moore in her essay “Storyboarding.” Inspired by storyboarding methods used in the film industry, Moore invented the method to visualize her novels’ plot structure.
This is a literal visualization: Moore creates a poster board with a large W and uses the shape of the letter to guide the rising and falling actions of her plot.
The W Scene Template in Plottr works much the same way as a W Plot storyboard. While the scene template doesn’t have the visual element, it has the five plot points of the W Plot Method that you can fill in as you write your scenes.
Three Ways to Use the W Scene Template to Improve Your Writing
Whether you’re troubleshooting an existing draft that just needs something more, or beginning to embark on your first novel, this method is an excellent way of diagnosing problematic scenes and prescribing a satisfying solution. Use it in a few ways:
1. Decide Which Scenes to Keep
Do some of your scenes feel flat, stagnant, or meandering? The W Scene method can help you discover and illustrate reasons to include a particular scene, decide if you need to combine scenes, or add more action or information to a scene to give it life.
You can analyze your scene using the W structure to justify each piece of your story this way.
2. Revise your Book by Adding the W Scene Template
If you’re revising a novel, try adding the W Scene method to each scene and filling in the various fields. This can help you determine what scenes need to be tightened, expanded, or dropped depending on what the exercise reveals. It’s a good way to ensure your plot stays grounded from one component to the next.
3. Focus on Each Scene’s Resolution
If you prefer not to plan in detail, you could still fill out the Resolution of each scene — what you hope the scene will accomplish regarding your story. Then, during the revision stage, look at the resolution you set and the scene you wrote to determine if you accomplished what you set out to do in the scene.
Introducing the W Scene Template in Plottr
In Plottr, the W Scene Template helps you plan the actions and realizations that will propel each scene along. Prompts guide you through following the W Method for each component of the structure.
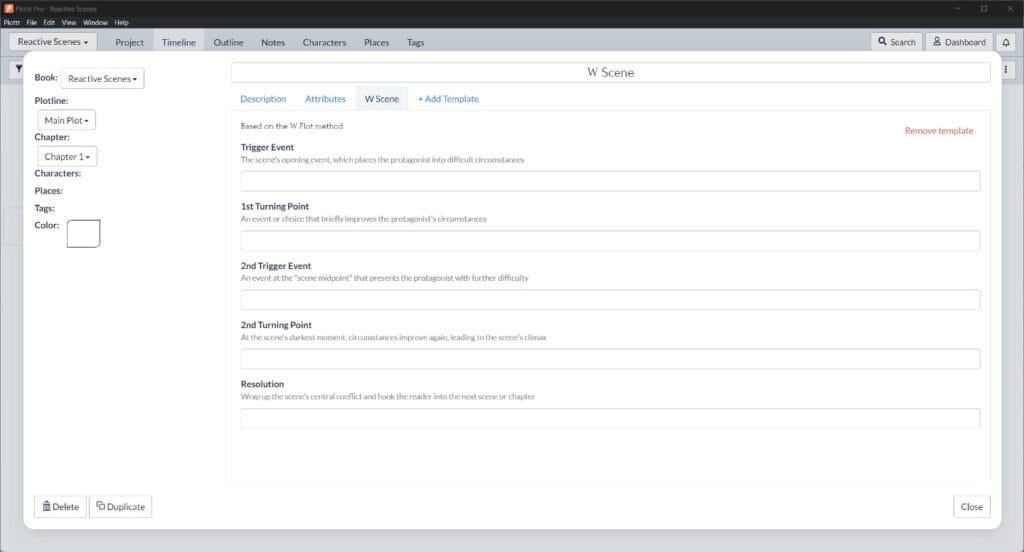
Here are the components of the W Scene Template in Plottr:
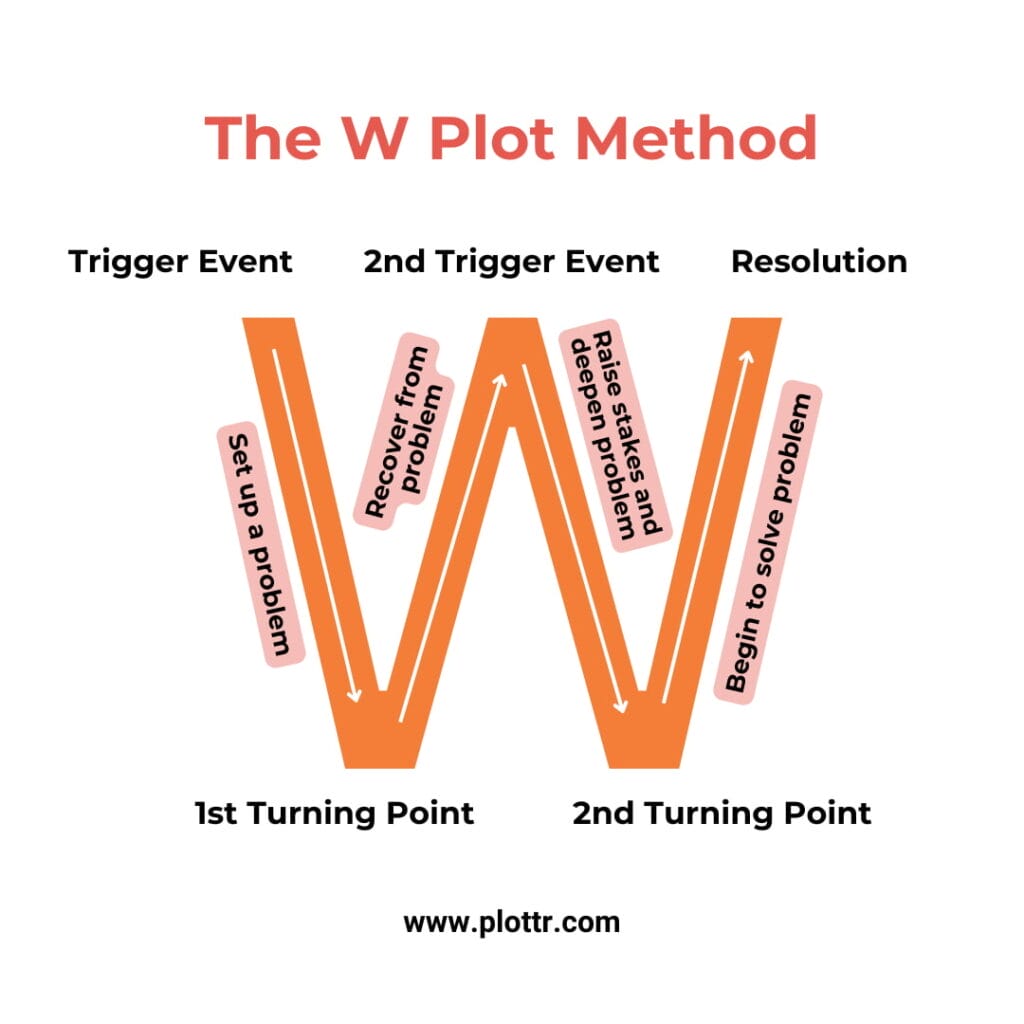
- Trigger event: The scene’s opening event, which places the protagonist into difficult circumstances
- 1st Turning Point: An event or choice that briefly improves the protagonist’s circumstances
- 2nd Trigger Event: An event at the “scene midpoint” that presents the protagonist with further difficulty
- 2nd Turning Point: At the scene’s darkest moment, circumstances improve again, leading to the scene’s climax
- Resolution: Wrap up the scene’s central conflict and hook the reader into the next scene or chapter
Imagine the action falling at each trigger event and rising at each turning point to visualize the W shape.
Example Using the W Scene Template in Plottr
In Act I Scene 1 of Hamlet, the soldiers Marcellus and Bernardo discuss seeing a ghost for the past two nights while patrolling the castle of the royal family of Denmark. The ghost appears to them again in this scene, looking like the late king and dressed in his battle armor.
The ghost is also seen by Horatio, a friend of Hamlet. In Act I Scene 2, Horatio tells Hamlet that he’s seen the ghost of his father. Hamlet joins the patrol that night to see this ghost for himself. Then in Scene 4 of Act I, the ghost appears to the soldiers, Horatio, and Hamlet, gesturing for Hamlet to follow him.
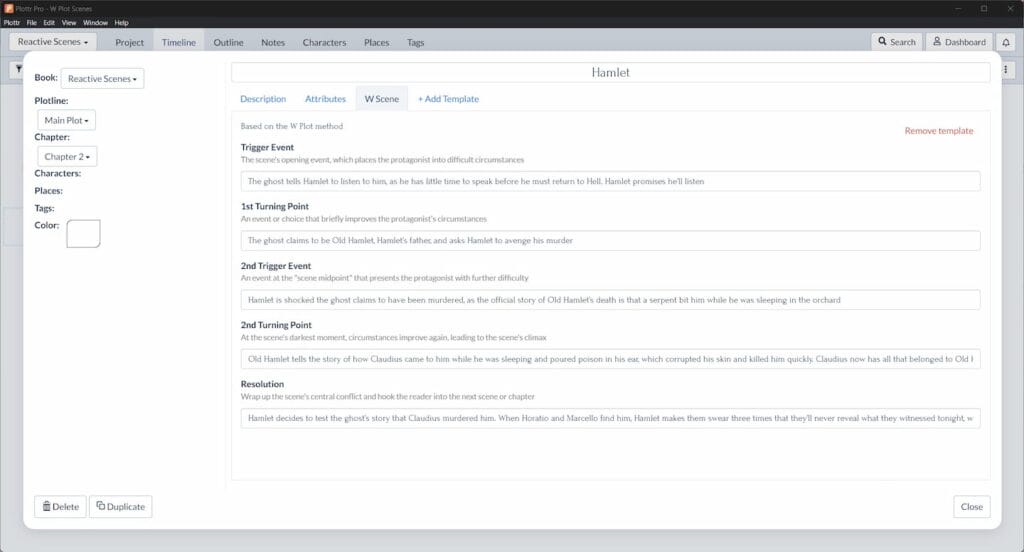
Let’s take a look at Act I, Scene 5, structured according to the W Scene method:
- Trigger event: The ghost tells Hamlet to listen to him, as he has little time to speak before he must return to Hell. Hamlet promises he’ll listen
- 1st Turning Point: The ghost claims to be Old Hamlet, Hamlet’s father, and asks Hamlet to avenge his murder
- 2nd Trigger Event: Hamlet is shocked the ghost claims to have been murdered, as the official story of Old Hamlet’s death is that a serpent bit him while he was sleeping in the orchard
- 2nd Turning Point: Old Hamlet tells the story of how Claudius came to him while he was sleeping and poured poison in his ear, which corrupted his skin and killed him quickly. Claudius now has all that belonged to Old Hamlet, including his queen
- Resolution: Hamlet decides to test the ghost’s story that Claudius murdered him. When Horatio and Marcello find him, Hamlet makes them swear three times that they’ll never reveal what they witnessed tonight, with the ghost’s voice commanding them to swear. They do swear, and return indoors
You can see how the trigger events spark tension, the turning points address that tension, and the resolution provides a certain conclusion to what has occurred.
How to Use the W Scene Template in Plottr
If this sounds like a helpful device for building your scenes and stories, you’re in luck: with Plottr, incorporating the W Scene Template into your scene outline is easy.
First, get a free 30-day Plottr trial or purchase a Plottr plan.
Once you have Plottr set up on your computer, just follow these five steps to add the W Scene Template to your scene card:
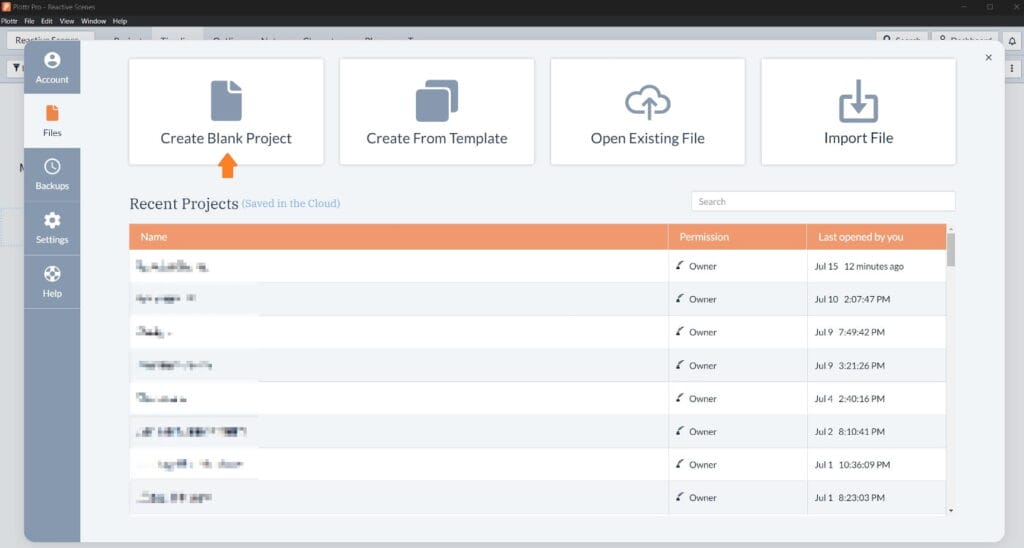
- Step 1: Open Plottr and in the Files tab of the dashboard, click Create Blank Project (or open an existing one)
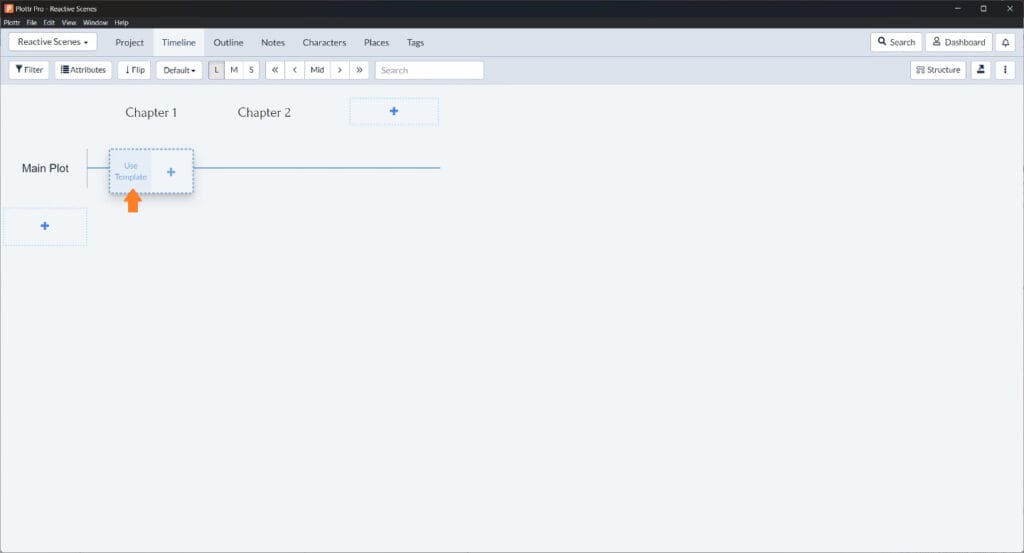
- Step 2: Hover over the plotline where you want to add a scene card and click Use Template in the box that appears
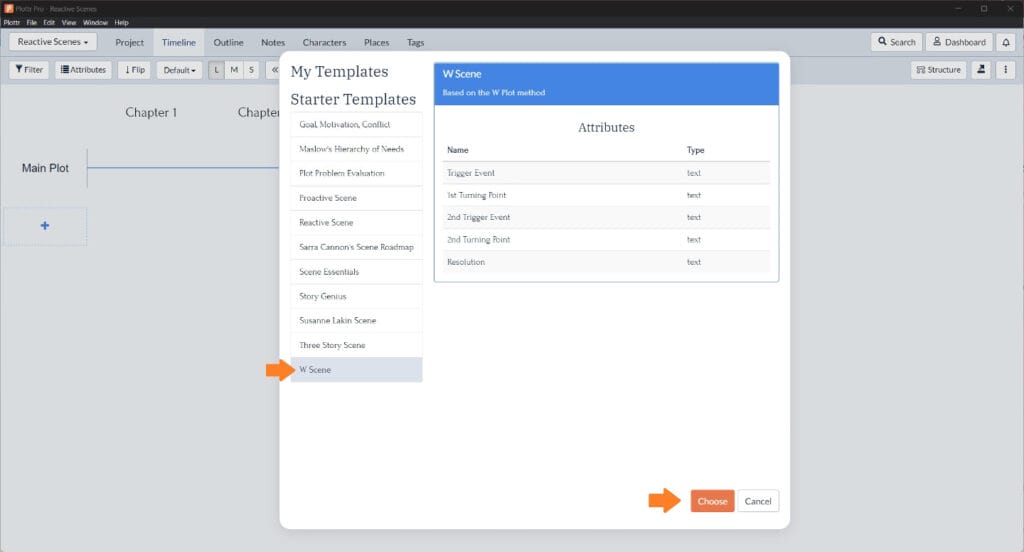
- Step 3: Select the W Scene template from the list of scene templates and click Choose to add it to your scene card
- Step 4: Name the scene card and press Enter to save it
- Step 5: Open the card and start filling out the template!
You can also add a template to an existing scene card by clicking the +Add Template button within the scene card — much like you would add a character template to an existing character profile.
Try these scene templates to add other elements to scenes such as POV, hook, and more:
Write Scenes that Rise and Fall and Rise Again
Ready to get started using the W Scene Template in Plottr? Sign up for a free trial or purchase Plottr today and see how the W scene template among many other features will help you create more complex and compelling scenes.


Comments