Visually tracking your story elements is a powerful way to see vital information at a glance. Color-coding in Plottr is just one of the flexible ways you can turn timelines, scene cards and tags into even more efficient story-planning tools. Read on for how to customize colors in Plottr, and nine ways to use color-coding creatively.
What Can You Color-Code in Plottr?
There are multiple ways to add custom color elements in Plottr:
How to Assign Colors to Plotlines
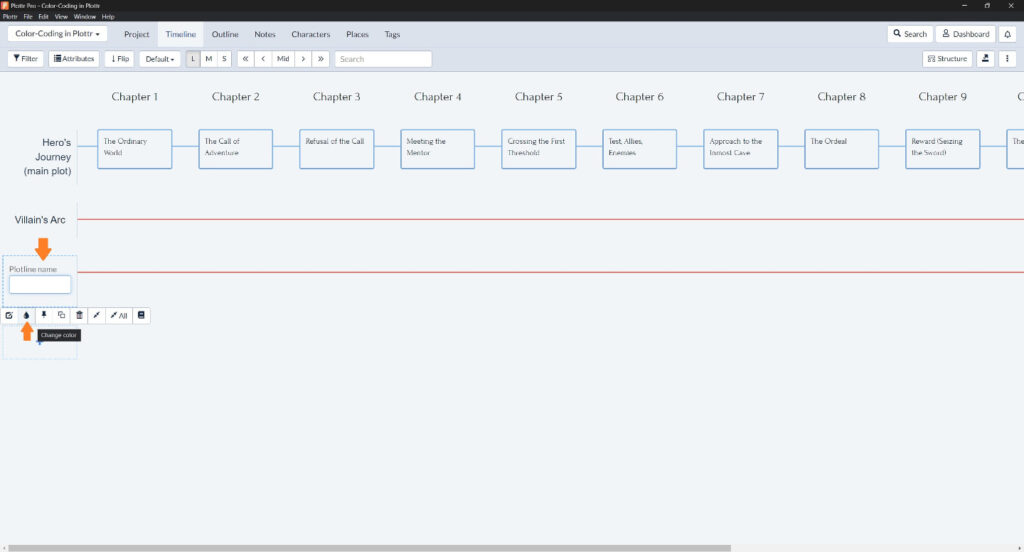
Let’s say you’re in the Timeline view and you want to add an arc to track an antagonist’s progress alongside your protagonist’s arc. What if you want to make your villain’s plotline red?
- Click on + or choose Use Template below your first plotline
- Give your new plotline a name (e.g. “Villain’s Arc”).
- Hover over the name of your new plotline and click the Change Color droplet icon.
- Click on an available custom color or type in a color hex code or name and click Choose.
Now your entire plotline and scene card outlines will use that color:
How to Assign Colors to Scene Cards
What if you want to make your Plottr scene cards solid colors, not just the card outline?
- Click on the scene card you want to color
- Click the outlined color swatch next to Color on the left (or the Change color droplet icon that will appear next to it on hover)
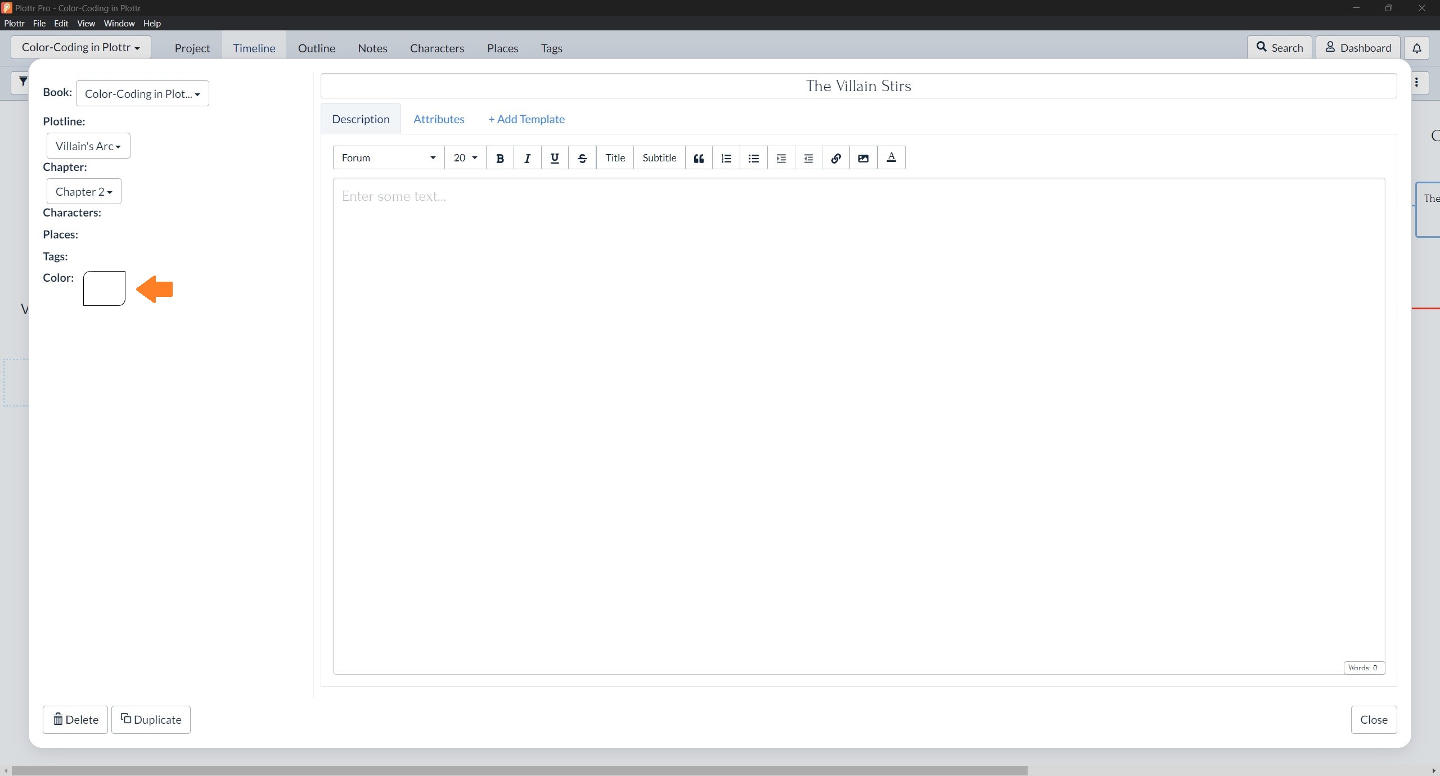
- Select the custom color you want (for example, red). The swatch outline should now be filled in with your chosen color
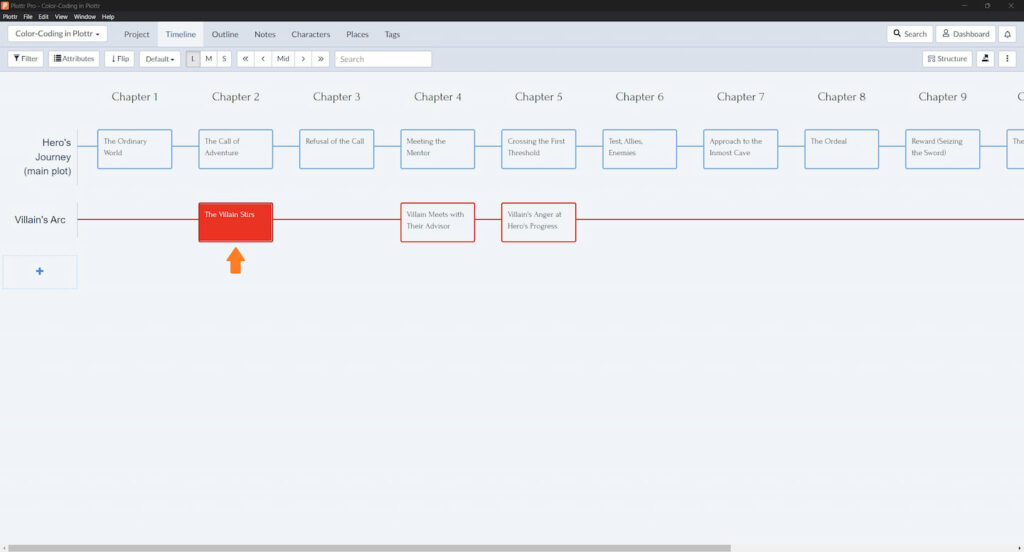
- Click Close bottom right of your open scene card to return to the Timeline view. Your scene card should now display filled in color
How to Assign Colors to Tags in Plottr
A third way you can customize colors and color-code in Plottr is by assigning colors to tags.
Tags are a powerful way to organize and categorize elements of your story, as you can filter by tags in the timeline view to see only scenes that have a specific mood, POV narrator, theme (or any other tag category you can think of!).
To create tags and assign colors:
- Click on Tags in the top navigation to go to the Tags tab.
- Click on the + under Main or Uncategorized to add a new tag (you can add, reorder, rename and remove tag categories by clicking the Categories button top left).
- Give your tag a name and click the Change color droplet icon above the create tag dialogue and select a custom color, then click Save.

You should now see your new tag, outlined in the custom color you chose (in this example, green for a tag for ‘Forest’ under the category ‘Biomes’ you might create if you wanted to tag different kinds of terrain in worldbuilding).

So, now that we’ve explored three ways to color-code elements in Plottr, what are creative and useful ways you can apply these customizations to your Plottr projects?
9 Ways to Use Color-Coding in Plottr for Planning and Writing Process
Here are nine ideas — please share how you use color-coding in the comments!
Track Stages of Drafting, Editing and Revision
Writing the scenes of your story out of order, or simply want the satisfaction of seeing the colors change as you check off each stage of your writing process?
Use scene-card colors to indicate whether a scene is written, to-be-written, or still needs to be revised.
Here’s an example where written and revised scenes are green, to-be-written scenes are gold, and to-be-edited scenes are red:

See Scenes’ Viewpoint Narrators at a Glance
What if you’re writing a multi-POV story (think of William Faulkner’s fifteen narrators in As I Lay Dying)?
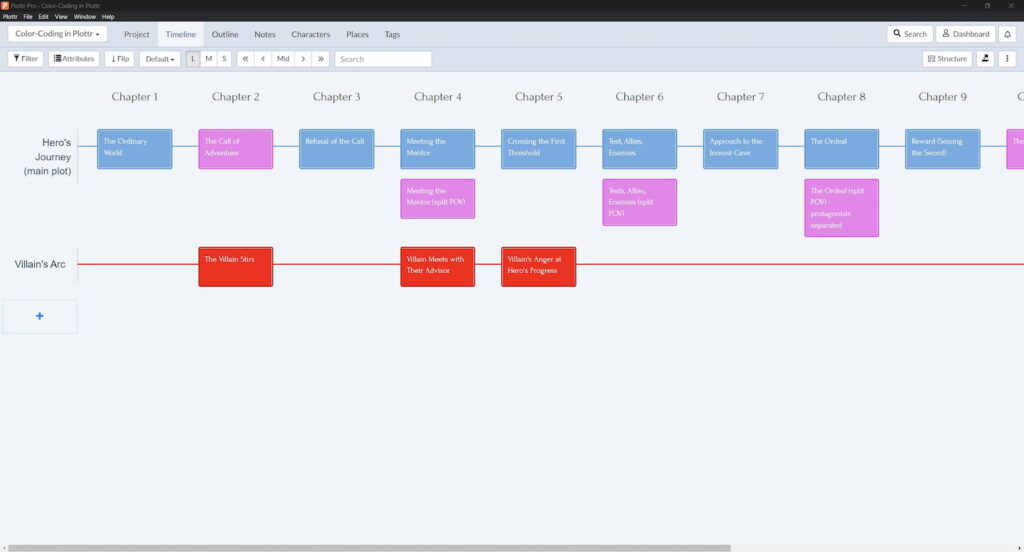
Giving each narrator a specific color for their viewpoint beats or scenes is a great way to see at a glance which scene you’ll tell from which point of view. In this example, there are two narrators – a hero and their sidekick, in blue and violet, and an antagonist’s occasional POV chapters colored red:
Juxtapose Action and Reaction Beats and Scenes
What if you want to see at a glance whether a scene sets up proactive action, or explores the fallout from or reaction to earlier events?
Try coloring proactive action scenes one color (e.g., green), and reactive scene sequels another color (e.g., red).
Visualize the Mood or Emotional Tone of Beats and Scenes
What if you want to see at a glance whether a scene is upbeat or downbeat, happy or melancholic?
You could assign either color-coded tags to each scene according to their mood or tone, or color your scene cards directly, associating each chosen color with an emotion.
Pro tip: If you use tags, remember that you can then filter your timeline by those tags (e.g. ‘Upbeat’) so you can toggle between seeing all scenes and only scenes that have that specific tone.
This is helpful for seeing where parts of your story may carry the same tone a little too long, where you may want to switch it up a bit.
How to Filter Your Plottr Timeline By Tags
Say you’ve set up a Tag category called ‘Emotional mood’ and you’ve tagged your scene cards according to the mood of each scene. To filter your timeline by scenes’ moods:
- Click the Filter button top left featuring the funnel icon
- Click the checkbox next to the mood category you want to display
- The words Timeline is filtered (with an x you can click to remove the filtering) will display next to the Filter button. Your timeline will fade out any scenes that don’t have your selected tag(s) applied to them

Mark Scenes’ Relative Timelines
Imagine you’re writing a historical novel involving flashbacks to an earlier period, a present timeline, and maybe even flash forwards to future events.
Color-coding scenes would be a useful way to mark which scenes are in a present-day timeline, which happened in the past, and which are in the future relative to the story’s present-day timeline.
This way, you could see which scenes lie within which of three timelines at a glance.
Another way to do this would be to have separate plotlines for each timeline – that’s the flexible thing about Plottr!
Track and Vary Scenes’ Pacing
Color-coding in Plottr is useful at the planning as well as the revision stage.
Say, for example, you’re doing a reverse outline of a zero draft you’ve already written. As you read through your draft, you could mark scenes using different colors according to their pacing.
Maybe fast, action-packed scenes get a warm color like orange. Slower, more interior scenes get a cooler color like blue-gray.
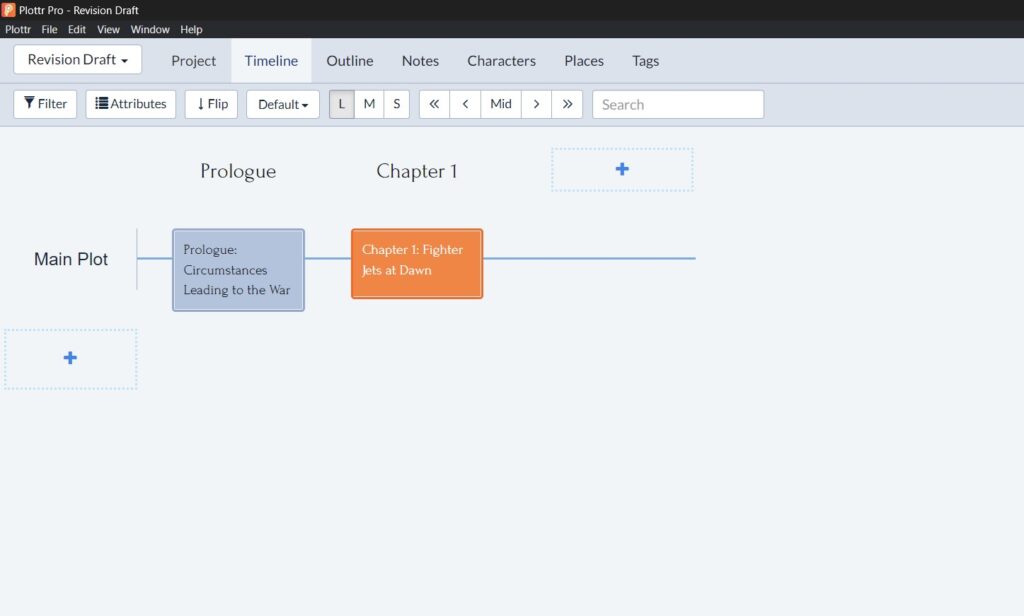
This is a great way to see at a glance where you have a group of slower scenes and you may want to move things around or insert a faster or slower scene to vary pace and keep it interesting.
Chart Stages of Character Development
Another way to use color in Plottr is to chart character development. Say, for example, you’re writing a contemporary novel about a character battling with grief in the wake of personal loss.
You could give each stage of your character processing their grief a color corresponding to the stages of grief, for example (which don’t necessarily all occur, or in this order):
- Denial – Gray
- Anger – Red
- Bargaining – Yellow
- Depression – Dark blue
- Acceptance – Green
You could color-code scene cards (or use each of the above as color-coded tags) where any of these stages feature in a scene.
Track Key Types of Conflict
Another way to color-code in Plottr is to use different colors for scenes focusing on internal vs external conflict.
This is where a tag category for ‘Conflict’ would be helpful, as you could then filter your Plottr timeline to see all external conflict -driven scenes together, and all internal conflict -driven scenes together.
Visually Indicate Crucial Worldbuilding Story Sections
This is an idea for fantasy authors and others writing speculative fiction featuring worldbuilding.
Try color-coding scenes or tags according to what type of worldbuilding they contribute to. For example, you could use differently colored tags for scenes that set up:
- World history
- Magical systems
- Pivotal places in your world
- Peoples, flora or fauna
How Do You Use Color in Plottr?
What ways do you use color-coding in Plottr? Or have you yet to use this feature much? Share your thoughts in the comments below!
New to Plottr? Get started painting-by-scenes with a free 30-day Plottr trial.





Comments