Writing a book without a plan is like trying to draw a complex geometric design freehand. The outcome might be a little wonky without a ruler! The Snowflake Method offers another way to grow the simple clarity of an idea into a fully fleshed out novel. Plottr’s snowflake method project template breaks the whole process down into easy steps, too. Read on to see how!
What is the Snowflake Method for Outlining a Book?
The Snowflake Method was designed by author, physicist, and self-described “computer geek” Randy Ingermanson. He details this technique in his book, How to Write a Novel Using the Snowflake Method.
The premise of this ten-step method is simple. You work through structured tasks that increase story detail and complexity. Starting from compact summaries of your story idea, you’ll add further details until you have the structure to support a full draft.
How Will the Snowflake Method Template Benefit Your Writing?
The Snowflake Method writing approach will appeal most to plotters who enjoy methodical process. Even if you write off the cuff (and prefer “pantsing,” or writing by the seat of your pants), it helps you avoid overwhelm. You’re less likely to get hung up on details before the foundation of your story is clear.
The Snowflake Method outline template in Plottr — with easy to understand notes by Randy himself — will help you:
Develop Story Ideas in Succinct, Focused Stages
Ever finished a draft and wondered how on earth you’ll condense it into a summary that’ll appeal to agents or readers?
The Snowflake Method offers a neat trick: Reversing that process. You start from a single sentence summary of an idea, and build from there.
It’s a practical way to outline, since smaller, more manageable tasks add up into something complex and deeper.
Build Complex Stories through Fun Exercises with Clear Scope
Writing longer formats such as novels and screenplays may feel daunting. “Pantsing” an 80,000-word epic is risky, too, as pacing or turning point placement could be off.
The Snowflake Method is one approach of many valid story outlining options, as Randy shares in his intro to the template. Yet this method is worth trying if you’d like to work in manageable steps to give new ideas real legs.
Enjoy a More Non-Linear Writing Process if you Prefer
One of the benefits of using the Snowflake Method Project Template is that you don’t have to work in a totally linear way.
Say, for example, you’ve completed later steps and you have a fuller idea of your one-sentence summary. You can go back and make changes anytime.
No outline must be rigid. It’s a means to an end, and you can modify it as you discover more in the writing of your story.
Example of the Snowflake Method Outline: 10 Steps, Explained
The Snowflake Method Project Template in Plottr contains the following:
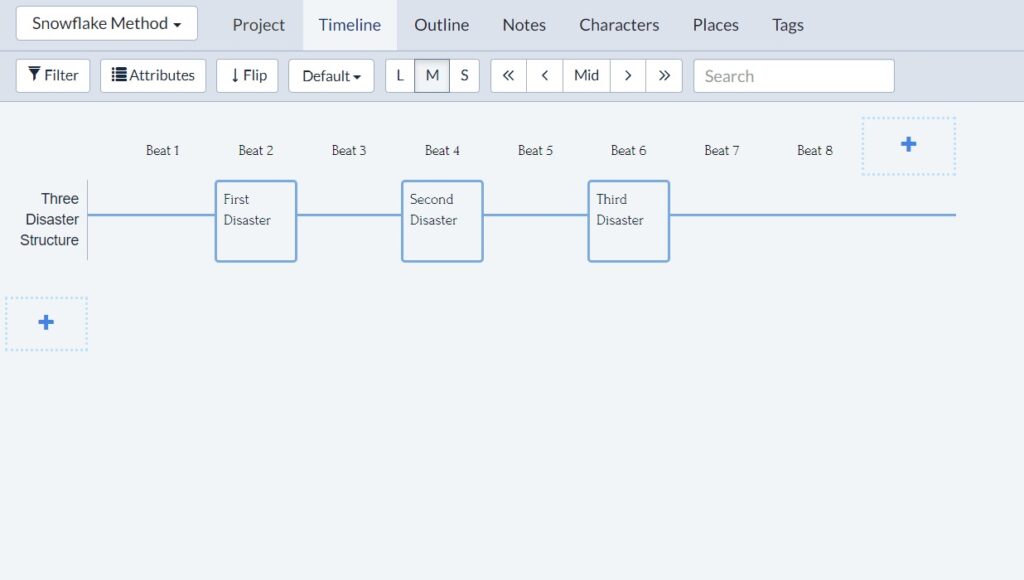
- A plotline labeled “Three Disaster Structure” with three scene cards for “First Disaster”, “Second Disaster” and “Third Disaster”
- Notes by Randy introducing the Snowflake Method, explaining each step, and providing space to complete each step
- Tags for Characters, Plot, and the Snowflake Method
- Preloaded custom attributes for characters (character sheets) that will help you complete steps 3, 5 and 7 (outlined below)
Here are the 10 Snowflake Method steps in Plottr, with several examples:
Step 1: Write Your One-Sentence Summary
Here you write a one-sentence summary of your story idea. Randy suggests taking an hour for this. There’s more detail in the template’s notes. Try it for free with a 30-day Plottr trial.
Example: In his notes, the author gives this example (the premise for his novel Transgression): “A rogue physicist travels back in time to kill the Apostle Paul.”
Step 2: Write Your One-Paragraph Summary
The next steps create expansion, as your idea opens outwards. Randy shares tips for writing a one-paragraph summary that begins to explore greater detail.
Here you should:
- Describe the story setup
- Outline key disasters that occur in the story’s arc
- Brainstorm an initial ending idea
Randy goes into detail about story structure in his notes here, so it’s worth reading through the full template notes in Plottr.
Example: Let’s take this logline: “Close friends staying at a remote cabin witness a terrifying event, but their bonds are tested when each friend has conflicting memories of what happened.”
For Step 2 of the Snowflake Method, you could summarize the inciting incident that led to the friends’ holiday. You could brainstorm key disasters associated with this event, in each of the friend’s POV. Maybe you’d have an initial idea for an ending. Maybe only one of the friends is a reliable narrator and the other two were lying to cover their tracks.
At this point, have fun and let your ideas grow. You can change any details later.
Step 3: Write Your Character Definitions
The third step dives deeper into characters. Randy advises taking an hour to fill out the beginnings of the included character template, for each of your characters.
This you do in the “Characters” tab of Plottr. Custom attributes for the Snowflake Method process are loaded in for each character automatically with the template.
Example: We could take one of the friends from our example above.
Name: Jess Rush.
Role: Main character and viewpoint narrator.
Story goal: Find the truth of what happened that terrifying weekend at the cabin.
You get the idea (see the Snowflake Method template for the full character sheets).
Step 4: Write Your One-Page Synopsis
The fourth step involves expanding each sentence of your one-paragraph summary into a paragraph of its own.
This deeper investigation of the condensed version of your story will help further ideas rise to the surface. Says Randy:
At the end of the exercise, you have a pretty decent one-page skeleton of your novel, which we’ll call a short synopsis or a one-page synopsis. It’s okay if you can’t get it all onto one single-spaced page. What matters is that you are growing the ideas that will go into your story. You are expanding the conflict.
Example: See the one-page synopsis structure author Susan Dennard uses, and the example she gives for Star Wars.
Step 5: Write Your Character Synopses
You started defining your characters in Step 3. Now’s the time to write a summary of each character’s storyline (as you see it at this point in time).
This could change as you discover more as you draft. Yet it will give you guidance as you get going.
Example: We might write a summary for Jess, a character from our cabin story, all in third person and treating her as the hero of the story for this exercise.
“Jess Rush goes away for the weekend to her family’s remote cabin with two of her best friends. She’s hopeful it will help her forget a recent traumatic experience…”
You can fill in greater specifics (such as the nature of Jess’s trauma she wants to escape) later. You likely won’t know all the details yet!
Step 6: Write Your Long Synopsis
Once you’ve fleshed out more of your characters’ storylines and what motivates them, it’s time to write your long synopsis.
Here, Randy advises:
- Taking a week to expand your one-page summary into around four pages
- Cycling back to fix things in earlier stages of the Snowflake Method as more of your story comes into view
Now, the output may be longer than the synopsis you’d use to query an agent. That’s totally OK: this process is for you and for building your story.
Step 7: Write Out Your Character Charts
The seventh step of the Snowflake Method process in Plottr is to write out your character charts.
In the Characters tab, you may have filled in some custom attributes. Yet you can also create your own. Customize your character sheets so that you answer questions relevant to your story idea and cast.
Step 8: Create Your Scene List
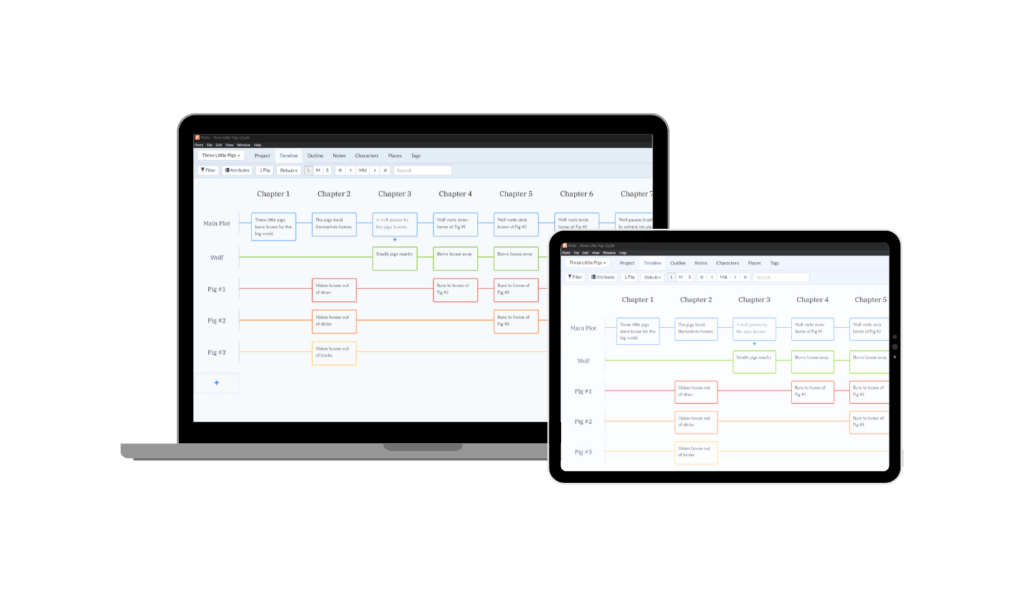
This is where you begin plotting in the Timeline tab.
You’ll see that there are three scene cards preloaded with this Project Template:
- First Disaster: A turning point that happens approximately 25% into your story
- Second Disaster: Another turning point that occurs around 50% through your story
- Third Disaster A third turning point at around the 75% mark
Randy says of these three narrative points:
These three Disasters mark major turning points in your story. The first disaster commits your lead character irrevocably to the story. The second disaster causes your lead character to rethink what isn’t working and to choose a new approach that will actually work. The third disaster causes your lead character (and the villain, if you have one) to BOTH commit to end the story in some sort of final showdown.
Example:
First disaster: Jess and friends get lost while out on a hike near the cabin. The situation looks dire as night falls.
Second disaster: They survive the night despite paranormal incidents and make it back to the cabin.
Third disaster: Another hiker is found dead in the area and the three friends come under suspicion.
Step 9: Write Your Scene Details
This step involves writing extra details for the scene ideas you’ve brainstormed so far. Here you might want to:
- Make notes on setting details (the Place tab in Plottr is handy here)
- Write snippets of dialogue ideas to include in your scenes
- Plan specific goals, conflicts and setbacks for each of your scene ideas
Step 10: Write Your Novel
You’ve made it through the previous nine steps of the Snowflake Method template. What next?
You can export your outline document to Scrivener or Word and keep working there. You can also use the Outline tab in Plottr to sequence and edit event summaries to make an even more robust plan. Whatever works for you!
Ready to create the perfectly structured snowflake of a story?
How to Use the Snowflake Method Project Template in Plottr
First, install Plottr if you don’t already have it set up.
Make sure you have an active Plottr plan, or get started with a free trial.
Then follow these easy steps:
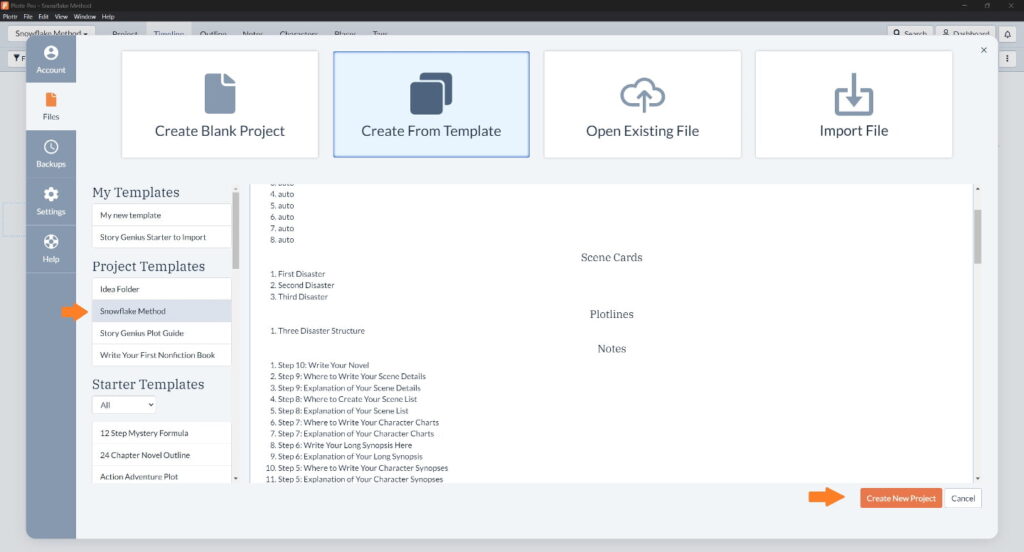
- Step 1: In the Plottr Dashboard, click Create from Template and choose Snowflake Method under Project Templates, then click Create New Project
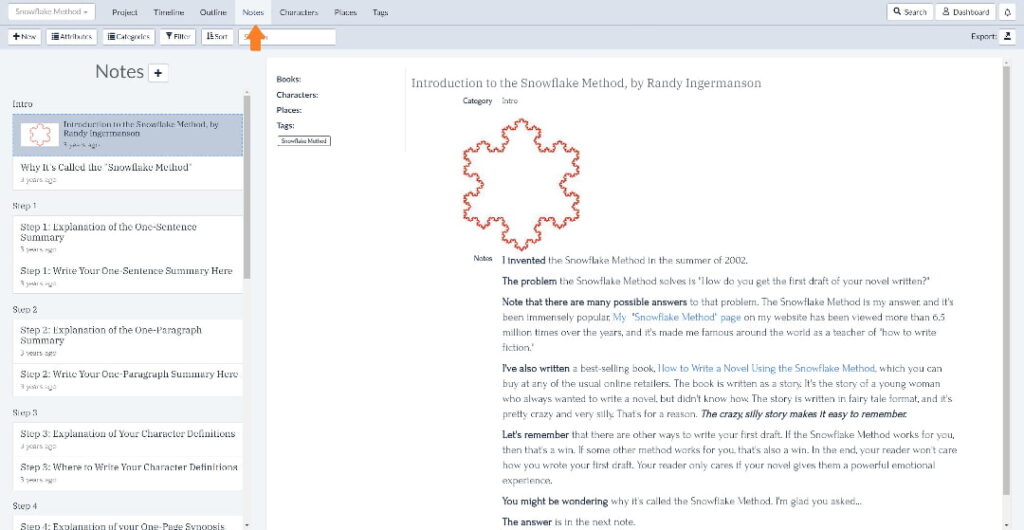
Step 2: Once you’ve given your project a name, it’ll open in the Timeline. Click the Notes tab to start working through Randy’s instructions.
Step 3: Complete the process, moving between the Notes, Timeline and Characters tabs where instructed to complete each exercise
And that’s it! A structured ten-step process to outline and write a book.
You can also add the individual parts of the Snowflake Method as templates to existing projects or projects using other starting points.
Learn how in these guides:
There’s Snow Time Like the Present
Ready to get plotting? Start your free 30-day trial of Plottr and discover the fun way to visualize and plan better stories.
Have you tried the Snowflake Method? What story structure works best for you? Share your thoughts below in the comments.



2 thoughts on “Snowflake Method Template: 10 Steps from Summary to Book”
I loved using the snowflake method. The only thing I had trouble with was figuring out how to easily cross-reference various entries in different areas of Plottr. For example, I wanted to reference what I’d written under characters when I created my long synopsis and later, my scene list, but found it very cumbersome to switch back and forth. I wanted to have some split screen options within Plottr. Perhaps I’m just not aware of how to use them, but it was a problem for me.
Hi Debbie, thank you for reading our blog and sharing this valuable feedback about using the Snowflake Method template. The primary switching would be between the Notes, Timeline and Characters tabs. I’ll share your feedback and suggestion about split-screen with the team.